Tuesday, December 21, 2010

A Simple Christmas {House}

I want to share my favorite parts of our Christmas house with you all.   I keep it simple with my Christmas decorating.  I take the "less is more" approach almost always.  Hope you enjoy the tour.

First off, I switched out the content of several frames in the living room with scrapbook paper.  I used sticker letters to spell out joy on one of them...  


More scrapbook paper and a snapshot of our favorite Christmas toy...


It just doesn't get much cuter than the Little People Nativity so why not frame a picture of it?


I love these 3 trees.  They were bought at our grocery store several years ago for $10.  Crazy.  I wish I had bought a few more sets...


I just filled my number jars each with three ornament balls...


I created a pennant banner for our tree this year.  I simply glued a ton of triangles to twine and I love it...


Our tree topper that we have had since we first got married decided to stop lighting up.  Maybe next year we will get a new one but I still love it...


I have a ton of ornaments in containers downstairs since my Mom has been giving me at least one every year since I was born.  Sometimes we use them, sometimes we don't.  Hanging on our tree this year are red ornament balls...


Homemade photo ornaments from last Christmas...


And a bunch of my favorite star ornaments...


The mini fabric tree that you saw last week sits on a tray on a table right under the television in our living room...


Our Christmas card display is simply red dotted ribbon with mini clothespins hung on our pantry doors...


We always have red and green candy in a jar in the kitchen. This year sitting next to the jar is my Martha Stewart Christmas Cookbook that I have never actually cooked anything out of but love as a Christmas decoration...


Our Christmas Countdown Frame sits on top of the toy shelf in the living room with a photo of one of our past Christmas trees, a little tree that was a gift from a friend, and scrabble tiles spelling out Christmas...


Our Christmas table is simply stocked with red and white polka-dot placemats...


And of course a glass bowl full of ball ornaments.  I do it every year.  The classic Christmas decoration...


Then there is my girl's room.  They have a pink Christmas.  My sister bought this tree for Avery a couple years ago complete with pink lights and pink ribbon for bows.  She loves it.  My Mom made a pink fluffy tree skirt for it too.  And this year I found that pink rhinestone tree topper at Hobby Lobby.  She also uses her own ornaments and decorates it to her heart's content...


I got out some pink scrapbook paper and cut it in various sized rectangles.  Avery wrote the letters to spell out Merry Christmas and we used paper clips to attach it to the clothesline in their room...


Their Little Golden Book shelf is filled with Christmas books and their own set of mini fabric trees...


But my very favorite decoration of all is our little santa baby girl...


Yes, it is going to be a very merry Christmas at our house.  


Merry Christmas to you!


I will be linking to the Holiday Home Tour at the CSI Project. 

Visit thecsiproject.com

Read more...

Monday, December 20, 2010

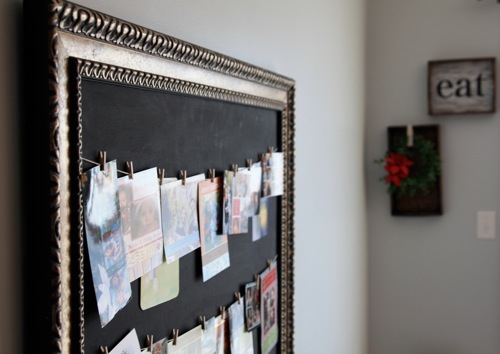
Chalkboard Clothesline Christmas Card Display

IMG_9947.JPG

Like many of you, I love receiving Christmas cards. But a few weeks into the holiday season I start to get more and more annoyed as they repeatedly slide down or go flying off of the refrigerator door every time that I open or close it. True, the problem is me and my desire to display them on the fridge, not the cards themselves. So I found a fabulous solution that was easy and inexpensive, a Chalkboard Clothesline Christmas Card Display. :)

IMG_9960.JPG

This is a bit reminiscent of my craft room clothesline photo display from this summer.

IMG_5112.JPG

I got this large frame back in the summer at the thrift store, and when I walked up to it I immediately thought to myself, Chalkboard! It's huge (42" by 33") and perfect for such a task. Once I got it home, I realized that it is an old Kirkland's sign. Pretty cool, huh? No wonder the frame was a bit ornate, and it was only $2.50!!! No way I could pass it up. It has been sitting in the garage ever since waiting for me to decide on a final destination for it, and I finally did.

IMG_9303.JPG

I took the cardboard out of the frame and painted it with a coat of chalkboard paint. Then I hot glued some cotton twine in 2 rows on the back of the cardboard and popped it back into the frame.

IMG_9312.JPG

I made this little pendant banner for that in-between time, when Christmas season has already started, but there aren't quite enough cards to fill up the frame. I wanted to keep it from looking too sparse in the beginning.

IMG_9970.JPG

I also stamped some little Christmas symbols on the backs of a few of the flags as a shorter alternative to the Merry Christmas message.

IMG_9951.JPG

Of course I hung each little flag (and card) with my favorite teeny tiny wooden clothespins, which you can get at any craft store.

IMG_9957.JPG

And that's it! I love how the frame and the black background look against my walls, and that it makes a perfect and neutral matting for a variety of seasonal pictures and well wishes!

You may want to switch this out for a larger piece of art or something that is normally on your wall, as it has to be on the big side to adequately hold a bunch of cards. I personally decided that this frame needs a permanent presence in my kitchen, and it will have to evolve seasonally as it is the only thing that's big enough to work on this long blank wall beside my table. I may just remove the clotheslines and use the chalkboard.

IMG_9959.JPG

Which also means that I'm saying goodbye to my Barn Wood Wall Art, and selling in my etsy shop. Check it out here if you're interested.

IMG_5009.JPG

Hope everyone has a wonderful Christmas!!!


E1025F317CFB5B8E9E5C526E5CC0F475 copy.png

Read more...

Saturday, December 18, 2010

Cutting Edge Stencil WINNER!!

On Thursday Lemon Tree Creations hosted a giveaway for Cutting Edge Stencils. They are incredibly versatile and easy to use stencils with endless possibilities! Check out my Kitchen Art, using the Bon Appetit! stencil here.

Now onto the fun stuff.. the winner of her very own stencil is...


Congratulations to Crystal, who loves the Casablanca Stencil!


Crystal, where are you going to use your new gorgeous stencil?? Email me your contact info and address and we will get it to you as soon as we can!

Congratulations again!

Read more...

Friday, December 17, 2010

Tag Frame

Christmas is just seconds away--(nail biting) shopping time is shorter, stores are crowded and well lets just say...I begin to get really flustered.

Sometimes I find that making gifts is always a fun and inexpensive way to shop! This inexpensive Tag Frame was inspired by all of the adorable TaGgie items I always see for little ones.

You could use any old wooden frame; mine is one of the DIY frames you get from Hobby Lobby ($.79) I painted it white.


Cut up ribbon of your choice approx. 2-3 inches long (depending on how long you want your tags to be). You will need several of each color!


First start by hot gluing to the front of the frame all the way across and then making a loop to the back and hot gluing there too! You will want to repeat this all the way around the frame.


Last, I trimmed the entire frame in this fun green polka dot and added a bow. My sister is going to love this as a gift from her daughter! I may add the year on the frame or even a monogram!

Thanks for stopping by! Don't forget to check out this week's link parties.

Read more...

Thursday, December 16, 2010

Kitchen Art

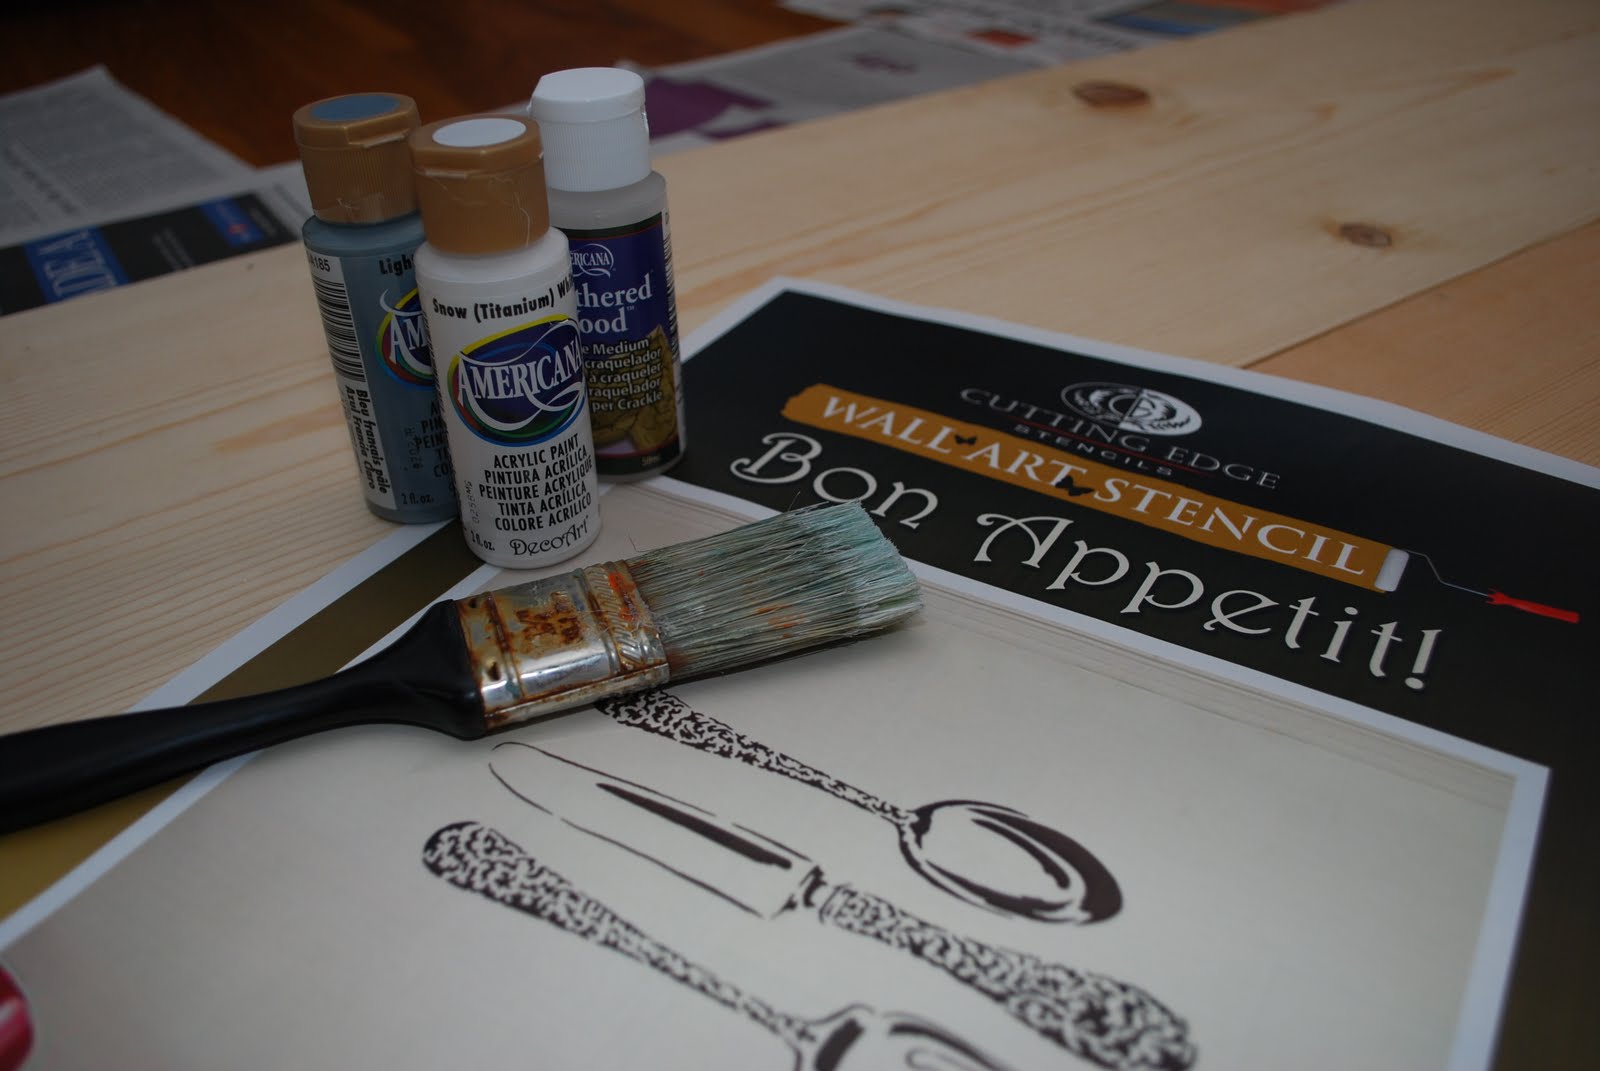
Cutting Edge Stencils have become a good friend of mine! I used one of their all-over stencils to transform my living room, here, a few months ago. Then I received my latest wall-art Bon-Appetit stencil in the mail a few weeks ago and got even more excited! Today I get to share with you my latest stencil creation.

I used these simply wonderful tools...
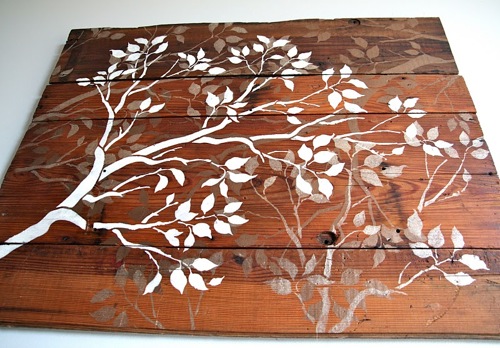
To create this...
What do you think? Here is how I did it...

First, I took two inexpensive oak boards from a local hardwood store and "mended" them together using two mending plates.

Next, I dry brushed three thin layers of white acrylic paint to the boards.
Then, I placed my Cutting Edge Stencil in just the right spot.
I decided to use Americana's Weathered Wood solution since I was attempting an 'weathered' look for my kitchen art. I simply followed the directions on the bottle, which was to apply one even coat of Weathered Wood to a dry acrylic painted surface. I applied the solution directly onto the stencil, just as I would with paint.
When the Weathered Wood solution dried, I applied my blue paint over the stencils. The results were awesome! The paint started crackling immediately to give me just the right finish! And as always, the stencil stayed in place, giving a fool proof finish.

To add to the aged effect, I lightly sanded all over the painted surface, trying to reveal some of the natural character of the wood. (I especially love all of the fun knots the wood had to offer!)
Now my kitchen art stands proudly in my kitchen, trying to hide the unfortunate immediate view of our unsightly fridge! I can definitely say it makes an impact right as you walk into the kitchen. I am loving it.

I have entered this into the CSI: The Color White Project:

Visit thecsiproject.com

**THIS GIVEAWAY IS NOW CLOSED!!! Please check out who the lucky winner is here.**
Now it is your turn to pick out a Cutting Edge Stencil of your own! That's right, we are having a GIVEAWAY!
Check out some of these great products Cutting Edge has to offer right now...

To enter this giveaway simply visit Cutting Edge and comment letting us know what your very favorite stencil is.

For an extra entry, you can "like" Lemon Tree Creations on facebook and comment letting us know.

THIS GIVEAWAY IS NOW CLOSED!!! Please check out who the lucky winner is here.

Happy Thursday!

Read more...
Related Posts with Thumbnails