Showing posts with label Spray Paint. Show all posts

Monday, May 16, 2011

Doormat Wall Art


2009 11 24 4417 thumb

I made these awesome wall hangings last year and they are one of the few decorations in my house that I have never gotten sick of or moved around. I saw the idea in Lowes Creative Solutions and obsessed over it until I could make them for myself. I shared them on my family blog at the time, but I've received so many compliments on them recently that I thought I'd share them here as well.

2009 11 24 4463 thumb

I started off with a few pieces of poplar board, 1 inch x 12 inches x 6 feet. I had them sawed in half, which left me with two 3 feet x 12 inch boards.

2009 11 20 4301 thumb

I sanded and stained the boards a dark walnut color,

2009 11 20 4309 thumb

lined the edges with painters tape, and covered the boards with this doormat that I picked up from Lowes. There were some places on the doormat where there was a little extra rubber attached to the design, so I cut this off first with an exact o knife so that the lines would all be crisp and clean.

2009 11 21 4328 thumb

I then spray painted 4 light coats of Valspar's Ivory through the doormat - 2 straight down on the mat and 2 from different angles to try to fill in all of the gaps.
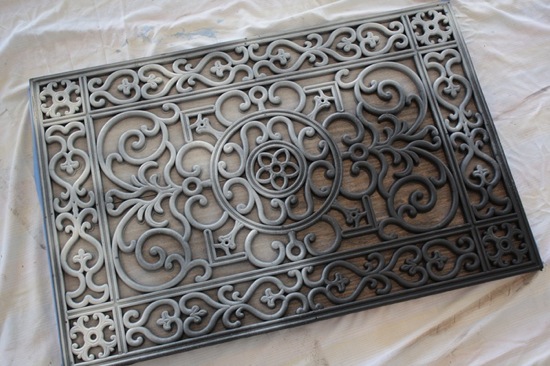
2009 11 21 4329 thumb

I allowed the paint to dry for about 30 minutes after the last coat,

2009 11 21 4348 thumb

and when I pulled the mat off I literally squealed with delight.

2009 11 21 4350 thumb

I sealed the wood with a spray polyurethane and hung those babies up as fast as I could.

I used heavy duty sawtooth hangers on the back of the boards, and hung them on wall anchors spaced about 13 inches apart.

2009 11 24 4456 thumb 1

The wood shows through beautifully and the design looks so elegant on the wall. The only real problem is that I wanted to put them in every single room of the house-the neutral wood and ivory go with absolutely everything! It took a lot of deliberation before they finally landed in the living room, but I was glad to finally have something to fill the space above the TV, and luckily my mom was willing to hold to hold them up against different walls while I debated.
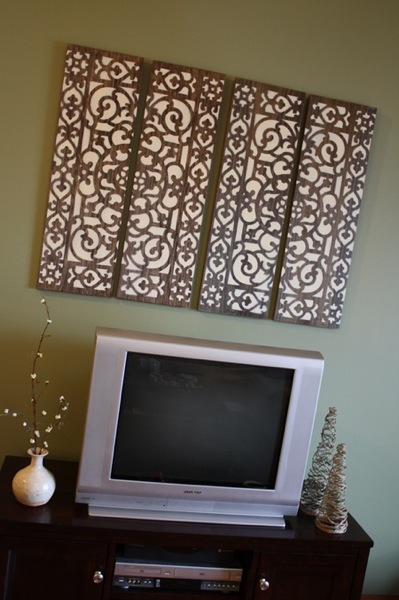
2009 11 24 4458 thumb 1

I'll be linking to these parties this week, so stop by to say hi!!

Have a great week!!

Read more...

Friday, December 3, 2010

Frosty's Hat


"There must have been some magic
In that old silk hat they found
For when they placed it on his head
He began to dance around"


Well I'm not so sure about silk, but this old wicker find will do the trick for me. Which is great, since I found both pieces for 1.50 at a thrift store. Along with a can of spray paint (I already had), some fun ribbon choices, a dab of hot glue, and some pipe cleaner!


With the weather outside being so blistery cold..spray painting was a little more difficult than planned this time...this called for not one, not two, but 4 coats of paint. (Brrr!)


Not only did Frosty's Hat need a ribbon, but a little decoration couldn't hurt. Next, I used pipe cleaner to spell out his name. (As I use this to label all my wrapped packages under the tree)


This fun ribbon was wrapped around the hat as you would typically see the same type of patterned scarf on a snowman out in a yard. The fun prints will go nicely with my tree and decor in my home. You could choose any color choice and it would work nicely with the black hat.

I chose to keep small packages in my hat for now, but I also thought this would be a great place to store fruit on the kitchen table, or simply fill the hat with ornaments for a decorating party which I will do for one of the holiday parties I will host this evening.

Thanks for stopping by and don't forget to check out these great parties this week!

Read more...

Monday, September 6, 2010

Classic Low Back Chair

Over the next few weeks, I'm going to show you some of the furniture that I've re-done for my craft room. I'll eventually have my big reveal, sorry to tease you with it but the truth is, It's not all the way finished yet. :) So for now you'll just have to settle for a few little tastes.


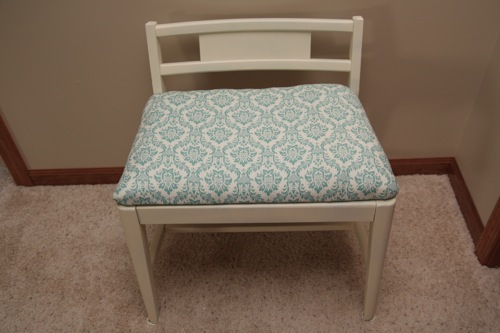
The first of which is, my pretty new low back chair!

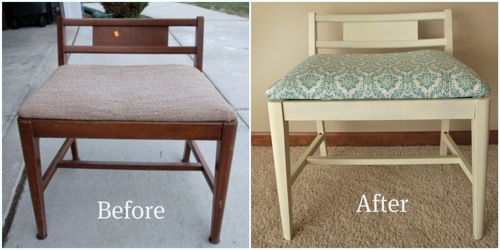
It never ceases to amaze me how a little paint and a great fabric can completely transform something. This chair was dumpy and forgettable, and now it's classic and stylish, I love it!!


Picnik collageba.jpg


The before, blah all around.


IMG_5536.jpg


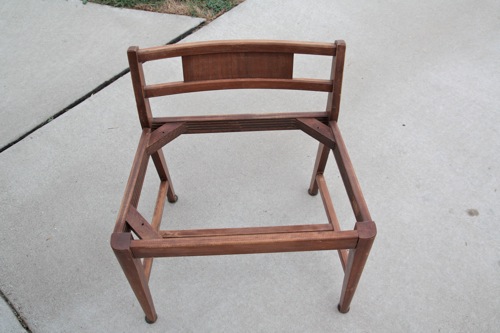
I removed the cushion and gave the frame a good scrub and a light sanding.


IMG_6380.JPG


Then a little primer...


IMG_6381.JPG


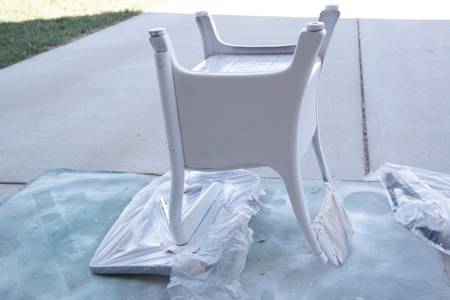
and Ivory spray paint by Valspar.


IMG_6383.JPG


The cushion that was originally on the seat was completely compacted so that it was now far from cushy. So I decided to cover the oldest layer of fabric that was holding this stuffing in with a new layer of foam and a new fabric. I didn't have a staple gun, so I opted to nail it down. If you're thinking to yourself, "That's now really the easiest way to go about that," let me just say that I agree with you wholeheartedly! It got the job done, but this may be a better option for people who aren't perfectionists.


IMG_6387.JPG


I don't know, how do you feel about a little bit of a scalloped edge? I couldn't handle it very well, decided that this would not be the project that would cure me of my perfectionist tendencies, and borrowed a staple gun from my neighbor asap to try to rectify the situation.


IMG_6392.JPG


I then just re-attached the cushion to the frame and was done.


IMG_6458.JPG


I opted not to roughed up any of the edges for the shabby chic look that I usually go for, and tried to keep it just chic. But if I change my mind, that look is only a few minutes with a medium grit sandpaper away. It's good to have options.


IMG_6472.jpg


Again, with my before and after. SUCH a big improvement!!


Picnik collageba.jpg


Did you notice I used the same color scheme and fabric as on my clothesline photo display? But you already knew that was in my craft room so I'm not giving much away.


IMG_5100.jpg


I'll be linking this up to these great parties, check them out!!


Happy Labor Day! See you next Monday!


E1025F317CFB5B8E9E5C526E5CC0F475 copy.png

Read more...

Monday, August 30, 2010

Drab to Darling Desk Re-Do

I have mentioned before that I have some pretty incredible thrift stores in my town. I know that it is only by sheer luck that I come across these treasures, and feel it is a duty of mine to bring them straight home, and gussy them up so that they'll reach their full potential. Such was the case with this darling little desk. I have already bought my son a desk (a really incredible old desk, but I'll get to that in a minute,) but this one is one of those super tiny ones, smaller than a kindergardener would use, and perfect for my 2 year old son right now. For only $3 I snatched it right up.

IMG_6249.JPG

First things first, I gave it a really good scrub with a bristled brush and some steel wool. It had a lot of funky cobwebs and rust all over the bottom, and since this is for my son, I wanted those to be good and gone.

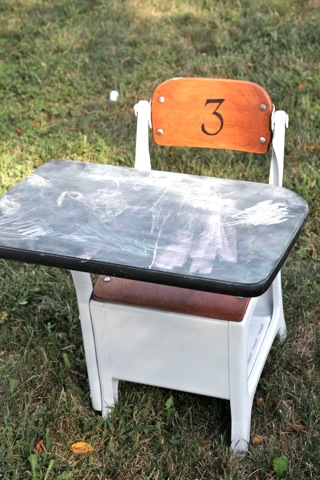
The top of the desk was a plastic laminate material that wasn't winning any beauty awards, so I decided to cover it up completely and made the top into a chalk board. I coated the whole top and edges in chalk board paint. I then seasoned the chalk board by rubbing a piece of chalk sideways over the whole top. This ensures that once we start writing words, letters or anything else on top, the lines won't be permanently etched into the paint.

IMG_6252.JPG

My son came out in the middle of this part and assisted in dusting off the chalk. I could barely keep him away the desk, he loved it already!

IMG_6255.JPG

Next step, paint the body of the desk. Something with this many little crevices called for spray paint, and I went with Rustoleum since it has such a high level of protection and stops any more rust from forming.

IMG_6270.jpg

I made sure to tape the desk well, all around the edges of the wood and the metal details. I then started spraying!

IMG_6271.jpg

I did 2 - 3 light coats of paint leaving 10-15 minutes drying time in between coats, then I flipped the desk over to do the bottom and the inside.

IMG_6272.JPG

Looking better already!!

IMG_6280.JPG

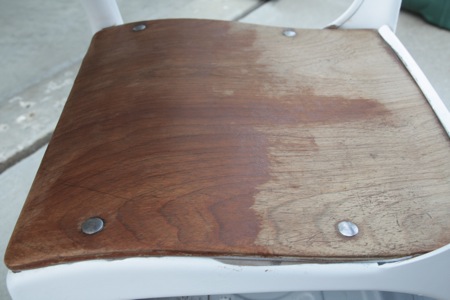
I sanded all of the grime off of the wooden seat and back until I was down to the wood. I then tried out this Americana gel stain in Oak.

IMG_6293.JPG

I really wanted to try this stain because it is water-based, and I really hate the fumes of oil based wood stain and the paint thinner that I then have to use to clean my brushes. I also don't ever know what to do with the thinner afterwards, so this let me avoid both of those situations.

IMG_6295.jpg

You'll need to use a different technique than with a oil based stain, where you would paint it on, let it soak in, and then wipe off the excess. For this water based stain, you paint it on a bit at a time, and then wipe over it with a damp cloth to help blend the color until it's as light or dark as you want. It took a few applications to get it just how I wanted, but once I was finished I really loved the warm oak.

IMG_6299.JPG

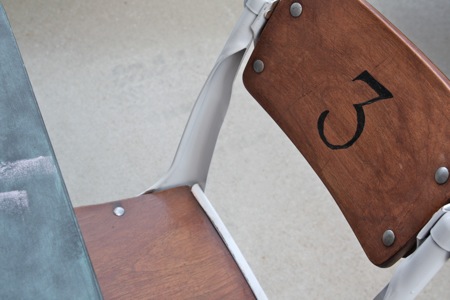
It needed a little something extra, so I went for a 3. If people ask me, "Why a 3?" I will say, "Oh, because Jayce is the 3rd member of our family!" or something like that. The real reason is, I wanted to put some sort of detail there, and this 3 was the best option in my craft room at the time. Sometimes my details are sentimental, and sometimes they are just completely random!

IMG_6306.JPG

I sealed the wood with a coat of satin polyurethane and I was done!!

IMG_6310.JPG

So?! Better, right?!

IMG_6359.jpg

My son just loves it! Actually, while I was in the backyard cleaning it and it's successor, the neighbors' kids came over and all 3 were fighting over writing on it.

IMG_6329.jpg

And here it is next to the bigger, up next for a re-furb desk. Isn't it tiny? And isn't the big one great?! It has a wooded desktop and a big hollow compartment inside for storage. I feel a responsibility to do this big one just right since it's such a great find, so I'll welcome your suggestions. But for now, we're loving the 2 year old chalkboard version.

IMG_6379.JPG

I'll be linking this up to these great link parties this week. See you next Monday!


DIY Club


E1025F317CFB5B8E9E5C526E5CC0F475.png

Read more...

Friday, August 27, 2010

The Croc Clock

These boots are made for....so many things I say.

I was wondering aimlessly in the thrift stores, as I often do when I found these cute boys Crocs for $3.00. I grabbed them and figured I could do something with them or give them to someone.

Well, they ended up lying around my house collecting dust as most things do until now. My $3.00 became a very handy boot. The clock-boot, the vase-boot, the clock-vase-boot...I think I'm kin to Dr. Seuss with the crazy words I'm making up. Anyway, bear with me on this craft adventure.


All you need is a rain boot, a clock movement kit, some spray paint and some fresh flowers.

First, spray paint the boot to the color of your liking. I used the Krylon spray paint. I'm lovin' the pink..it's so vibrant.


Next, use an exact-o knife to cut a hole in the boot wherever you would like to put your clock. I will be using my boot for a flower vase so the clock will be inserted close to the top so I can add water later!


Put the clock together as the package instructs you to do so. Push it through the hole that you created and add the minute, hour, and second hand. Lastly, add the battery and set the time.


If you are concerned about adding the water to the boot you could consider using an insulator inside the boot (i.e. plastic baggie to hold the water, slim glass container to place the flowers inside and then inside the boot as well.) I live on the edge a little and will try this out for a while so I encourage you to do whatever is comfortable for you. I'm curious to see just how long the battery and the moisture will last.


I placed my boot vase/clock next to my vintage foot measurer I already had, I thought why not. FYI..size 13 little boys shoe. hehe..


This is also a great piece mostly likely going in my classroom, something for a mudroom, a dinner center piece, or if you choose not to use it with the clock and just use it for a vase, it looks great in landscaping, sitting on the patio or in a window seal. Moose loves looking at it!

Hope you enjoy this silly conglomeration of randomness. Thanks for stopping by. I'd love to see what you'd come up with. Link it up to Flickr.

Linking up to these parties as well! Have a great weekend.

Read more...
Related Posts with Thumbnails