Showing posts with label Nursery. Show all posts

Monday, August 29, 2011

Hannah's Airy Vintage Nursery

I have been talking about my daughter's nursery for months now it seems. I didn't mean to drag it out, it's just that "Operation Nursery" came to a screeching halt once I was put on bed rest, and stayed there during the haze of the newborn phase. But now it is finished and I am so pleased.

Allow me to take you on a short tour.

The Room

Nursery 5

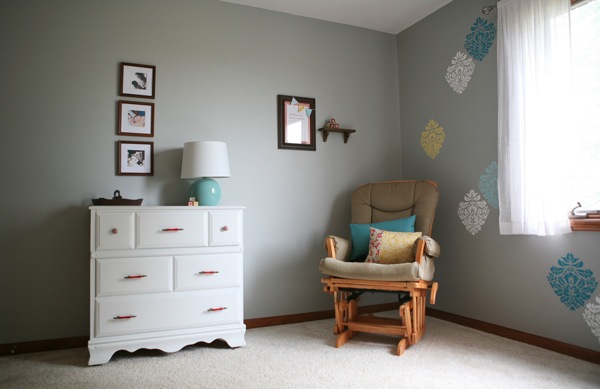
My favorite thing about Hannah's room is that it gets the most beautiful soft light, and with the light gray walls it seems to glow. I didn't want to take away from that at all, so I splashed my color on the feature wall in this fun damask pattern, and left the others blank so that I could play with furniture, fabric and other decor.

Nursery 10

The dresser was a flea market find, re-painted and gussied up with some new Hobby Lobby handles. I filled the frames with some of my favorite pictures of us with our new little lady. The lamp, tray, blocks and frames were thrift store finds, and the lampshade is from Target.

Nursery 24

Hannah's crib and glider were a part of her brother's nursery. I was initially disappointed not to have white furniture because I just love that look in nurseries, so I decided that I would compensate by white playing a part in all of fabric in the bedding and the other details of the room. Now that the room is complete, I'm glad that the crib and glider have a maple finish. It adds large chunks of warmth to the color scheme and blends everything together nicely.
Nursery 9

Nursery 19

I wanted her room to be sprinkled with a few of her brother's things, since the toys now belong to "the kids" instead of just my son, But I also wanted a few things that were just for her. The stuffed animals, books, baskets and the well-loved wooden train that adorn the book shelf had each belonged to Jayce. But the art piece is just for her.

Nursery 22

The Details

I was on a tight budget when pulling Hannah's room together, so most everything was found at a thrift store or made by me.

Nursery 27600x400

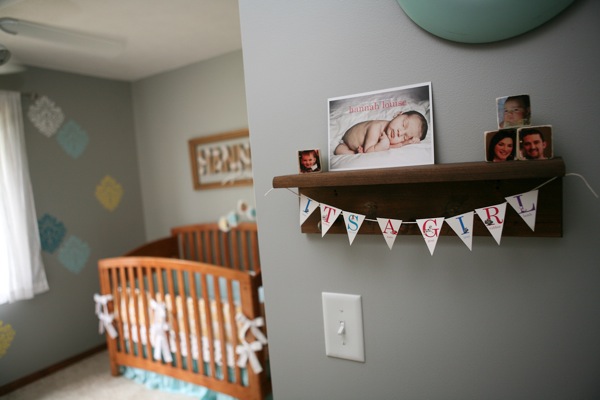
This little shelf display warms my heart!

I made the family blocks for my son about a year and a half ago and I thought it was such a fun little display of our family of 3! I was so pleased to make a coordinating block with a picture of our newest addition for an updated family display! I had used the "It's a Girl" bunting on her vintage inspired announcement, with a picture from the doctor's visit where we discovered her gender, so I was pleased to have that little trinket in her room as well. The photo on the shelf is her birth announcement. The three components together bring all sorts of memories to mind of the "before, during, and after" of my pregnancy and her addition to our family. Is that corny? Regardless, it's still what I think when I look at it. :)

Picnik collagedisp

I love this quote because we are constantly reading in our house. I used fabric as a mat since the frame was an unusual size, and printed the quote onto photo paper so that you wouldn't see the pattern through the paper. The bunting is made from fabric scraps that match her bedding.

Nursery 20

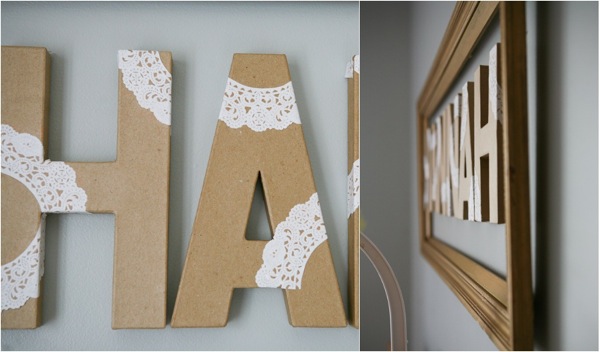
I wanted Hannah's name displayed beside her bed, so I wrapped doilies around these chunky letters to add a bit of daintiness to them. I found a large frame that we cut down and re-sized so that it would frame her name perfectly. I love the wood of frame. It has beautiful details and is a lovely gold color, but was a bit a bit beat up. I really like the mix of it being both elegant and worn, so I did nothing to it other than re-size it.
Picnik collagesign2

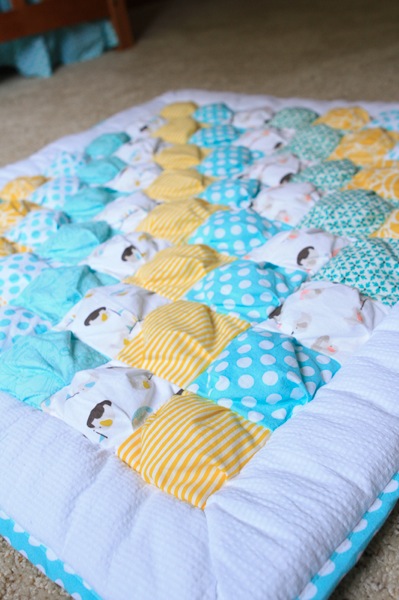
The color scheme and inspiration for her room came from this puff quilt that I pieced together throughout my pregnancy.

Picnik collagepuff

I pulled a few of the fabrics from her quilt to use for her crib sheet and ruffled crib skirt. All of these were my first attempts at sewing anything even remotely complicated, so if you are a new sewer, you can do it! :) I was hesitant to make the crib bumpers myself because of the safety issues that can come with bumpers, so I had a custom set made for me from the talented Isla of IslaCorrine. The craftsmanship is beautiful, she was so sweet to work with, and I just love how it completes the crib! Perfect!

Picnik collagebedding

I made these hanging fabric doilies with the same fabric used in the quilt and other areas of the room. I strung them onto the frame from my son's old mobile for a colorful and sweet display.

Nursery 14

I had extra quilt fabric that I had cut on the bias, so it was in perfectly long stretchy strips. I wrapped these strips around a few of the baskets on her shelves, and wove the longer strips around a basket that holds blankets beside the rocker. This added a nice pop of color to these baskets and pulled them into theme of the room.

Picnik collagescraps

The blocks are my husband, son and I's initials. I am on the lookout for a coordinating "h."

Picnik collagelammpPicnik collagedresser

I made a few throw pillows with coordinating fabric for the glider. When we no longer need the glider in the nursery I plan to keep her quilt and these pillows in the same corner for a little reading nook. I won the owl bookend from a giveaway on KoJo Designs from the adorable Etsy shop I Sew Lucky.

Picnik collagepillows

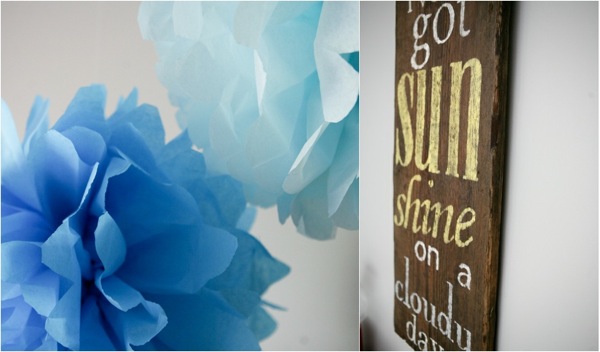
I shared her My Girl inspired Nursery Subway Art on Lemon Tree last week. It is one of my favorite things in the room. Unless my little lady is in there.
Picnik collagepretty

Wouldn't you know that with all of the colorful elements in this room, Hannah's favorite thing to stare at is the white ceiling fan? Go figure. :)

Color 2

What do you think? It was definitely a labor of love, and I'm so happy with it. :)

I'll be linking my nursery to some great parties this week, so stop by to say hi!

E1025F317CFB5B8E9E5C526E5CC0F475 copy

Read more...

Monday, August 22, 2011

Subway Art for the Nursery

Pin It


I wanted to show you one last project for my daughter's nursery before I show you the room as a whole, which I'll be doing next week. Here's a little peek.
Mygirl 1
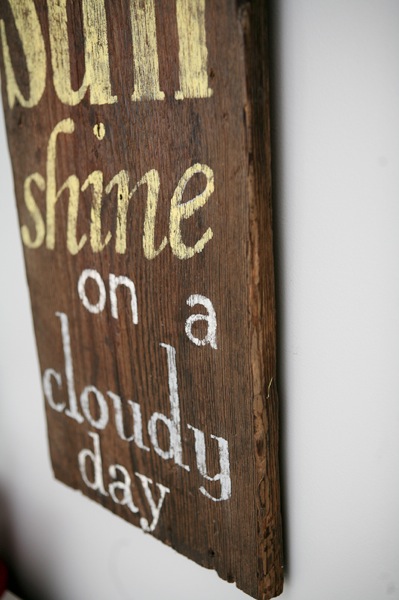
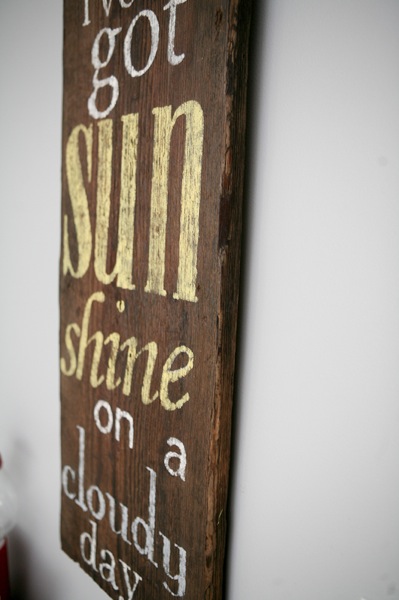
After the sonogram where I found out that I was having a girl, I found myself humming a little song by the Temptations quite often. Can guess which one it is? It became one of the main songs that I sang to my little bump as she grew, and I still sing it to her now. I knew I'd like a little piece of this to make it's way into her nursery, as it expresses how we all feel about her addition to our family and our lives. So this is what I came up with. Do you like it?! Want the details? Read on.
Mygirl 4
I started this project by rummaging through my small stash of wood, where I found a piece of old weathered barn wood that I thought would be perfect. I measured the width and length so that I could see roughly how large the letters needed to be and then turned to my Silhouette.
Screen shot 2011 07 03 at 1 12 27 PM
I browsed the wide selection of fonts available, tried a few of the lyrics in the different fonts until I found a few that I liked, and printed them in black and white on regular printer paper.
Ltc 2
I laid the words out on the wood, picked the fonts that I liked best, went back to the Silhouette and played around with the sizes a bit until everything fit just the way I wanted it to.
Ltc 3
I got some sturdy card stock and cut out each of the words using my Silhouette SD Cutter. I laid them out on the board just to make sure that I had everything exactly where I wanted it to be, and then took a picture that I could reference once I started my stenciling.
Ltc 4399x600
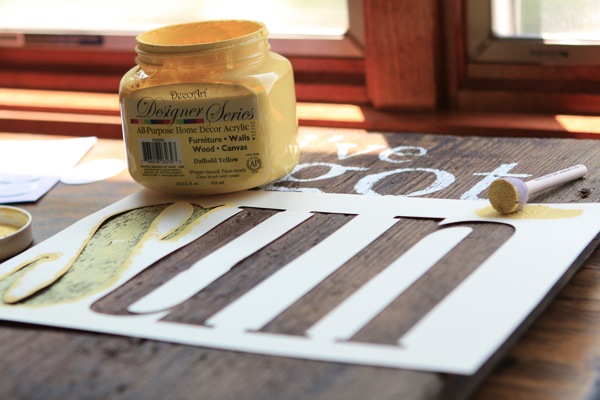
I pulled out my DecoArt paint in Daffodil Yellow and White, a few of the same colors that I used for the damask stencil on my nursery walls, in addition to Americana Paint in Grey Sky.
LTC 15
I used the cut out portion of the card stock as a stencil for this project. I laid it out one line at a time on the board, using my photo as a reference for spacing and centering.
LTC 11
I used this little sponge stencil brush, loaded it with paint, blotted off the excess, and lightly dabbed on the paint.
LTC 12
I wanted a light coverage, so I purposefully didn't work the paint into all of the cracks and crevices of the wood. I removed the stencil and gave the paint about 5 minutes to dry, which was all that it needed. I worked my way down the board, doing one line at a time and was finished in a flash.
LTC 13
There were a few places where the paint coverage was too thick for my liking, so I got a coarse sanding block and lightly sanded in small circles until I got the aged look that I was going for.
LTC 2
I then used my wire brush to scrape some lines into the paint and give it a further distressed appearance.
LTC 1
I sprayed the finished board with a light coat of polyurethane, added hanging wire to the back, and popped it up in the nursery.
Mygirl 3
I love love love it! It is impossible to rock Hannah in her room and not sing this song, and it brings a smile to my face every time I see it. It is one of those rare projects that turned out exactly the way I had pictured it in my head and I'm so happy with it!
Mygirl 2
I love the contrast of the coarse rugged wood and the crisp gray paint on the walls. It is a lovely addition to the nursery and I had the hardest time deciding where to hang it. I'm looking forward to showing it to you next week along with the rest of the nursery. Please stop back and let me know what you think!
I'll be linking to these amazing parties this week, and thanks to all of the wonderful hosts!
Have a great week!
E1025F317CFB5B8E9E5C526E5CC0F475 copy

Read more...

Wednesday, August 17, 2011

Cloud Baby Mobile {A Silhouette Project}

When we originally started the nursery planning with a boy in mind, I was all about vintage, classic, globe, airplane inspired things. The more I added to the nursery, including the board and batten and flashcards, the more I started the think the nursery was going to need just a little more whimsy. (You can see the entire nursery reveal here!)

So, after I found the perfect 'mobile' center piece, I pulled out my Silhouette SD to cut out some clouds from leftover scrap paper I had lying around.

I found the perfect cloud templates at the Silhouette store, 3 of them for only $.99!
 I sized them just right for what I was looking for, then sent them to the machine to cut. I knew I wanted double sided clouds, so I used the transform option on the Silhouette software and flipped my design horizontally as well so that I could cut it out on different paper. That way the clouds would fit perfectly and have a little something extra with two textures.
I took my freshly cut clouds, matched them up with their back pieces, and glued the two pieces together with a piece of fishing line threaded through the middle. 
After I was finished with three strands, two clouds each, I hung them from the ceiling using 3M hooks. 
 We added the perfect centerpiece, a great hot air balloon that we purchased online, and were finished. I am so excited to be all the way finished with this sweet room!
I'll be linking to some of these great parties this week.
Happy Wednesday!

Read more...

Monday, August 15, 2011

Puff Quilt & Pattern Giveaway

**This giveaway is now closed, but the 25% off discount is still available with the code LEMON25 at checkout.**

Hello everyone!! I have really enjoyed my maternity leave and the "baby" themed projects. Thank you again to each of my guest posters who allowed me to focus my time and energy on our new little one, our older little one, and occasionally take a shower. (Who am I kidding, I opted for a nap over a shower whenever I could.)

Puff quilt 13399x600

For my first week back, I am so thrilled to finally show off one of my favorite baby projects, and the item that was my source of inspiration for the rest of the nursery, my sweet girl's puff quilt!!!

Stencil 20

A few months after I discovered that I was pregnant, I started browsing for fabrics and color schemes for the nursery. I saved several photos and links, and upon going back through them I realized that there was a lot of yellow, aqua, and turquoise. The colors still seemed soft and sweet because they were often paired with white cribs and furniture, or in rooms with white trim or white walls. Since our baby furniture and wooden trim is walnut colored, and I didn't feel like painting it, I knew that I wanted white to have a real presence in each of the fabrics to bring some of that airy lightness.

Jayce 8

I saw the stunning puff quilts that Heidi of Honey Bear Lane created for her customers, and poured over the pattern that she created, trying to decide if I could take on such an ambitious project. I emailed her and said something like, "Can a beginner sewer do this?" and she responded sweetly, "You could definitely make this quilt! I was a beginner when I made my first puff quilt, and I didn't have a pattern to follow, I was just winging it. Just don't expect complete perfection." (I'm add libbing a bit here, but it was something like that.)

With that, I decided that I would attempt to make a puff quilt for my new little one, and I dove headfirst into the world of fabric.

Jayce 10Jayce 12

Almost all of my fabric was ordered online and I had an excellent experience. I found that most sellers were more than willing to indulge questions like, "Is this more of a sky blue, a turquoise blue or an aqua blue?" Several of them sent me fabric swatches to help me make up my mind, and they were all just so sweet to work with. I raced out to the mailbox every day and was delighted to find beautiful little bundles of fabric, all ready to be washed, ironed and cut. There were a few designs that weren't just right for the quilt but I didn't mind. I know that I'll put them to use in some other baby project in the future.

Mobile 5

I had never made a quilt before and I loved mixing up the different fabrics to see which combinations complimented one another the best.

Sheets 9

I experimented with different patterns and layouts, and took pictures of my different options so that I could choose my favorite.

Sheets 8

Heidi's tutorial walked me through the process beautifully, and each step was broken down so that I never felt overwhelmed by the project as a whole.

Puff quilt 8

I got to check off several "I have never ___ before" items after completing this project.

-I have never pieced a quilt together.

-I have never bound a quilt.

Puff quilt 11

-I have never made bias tape. (Yes, she ever taught me how to make my own bias tape!)

-I have never sewn mitered corners before. (Is that the right lingo? I am still learning to speak the sewing language. :)

Puff quilt 7

I made sure that the fabric used in the quilt made it's way into various projects around the nursery. Some of them I have shared already, like the fitted crib sheet and the ruffled crib skirt. But I still have a few more to share in the next few weeks.

Puff quilt 3

Curious about the fabric that I used in this project?

Puff quilt 4

1.) Michael Miller, Ta Dots in Ocean

2.) Yellow Ticking Stripe

3.) Cloud Nine Fabrics, Ele-Fete in Sky

4.) Riley Blake, Bloom and Grow Paisley in Blue

5.) Michael Miller, Ta Dots in Aqua

6.) Alexander Henry, Matisse in Yellow

7.) Riley Blake, Bloom and Grow Geometric in Blue

8.) Cloud Nine Fabrics, Ele-Fete in Shell

The binding is white seersucker, purchased from Hancock Fabrics. The back and bias tape are also Michael Miller Ta Dots in Ocean.

Puff quilt 5

I was so pleased to work with these beautiful fabric shops on this project: Cedar House Fabrics, Raspberry Creek Fabrics, Suzy Q Fabrics, and Skye Reve Fabrics.

Would you like to a chance to win a FREE copy of this pattern? Heidi is giving 5 patterns away to Lemon Tree Creations readers, just click HERE for the details on how to win!

I'll be linking to these great parties. Have a great week and Happy Monday! It's good to be back. :)

E1025F317CFB5B8E9E5C526E5CC0F475 copy

Read more...
Related Posts with Thumbnails