Showing posts with label Burlap. Show all posts

Tuesday, January 18, 2011

Sparkly Valentine Banner
Blog-15.jpg

When I showed you my Chalkboard Christmas Card Display last month you knew it would be appearing again, didn't you? If so, right you were! My new favorite item in my kitchen couldn't be neglected for long, especially when there is another sweet holiday around the corner. So I made this beautiful sparkly Valentine's day banner.
Blog-20.jpg

I started off with some creamy white burlap, a little flag template, and one of my favorite new tools, my Silhouette Cutting Machine, to make the stencil.
Blog-1.jpg
Before I had my Silhouette, I was a big fan of the pencil transfer method of getting letters and numbers onto my projects. But obviously that doesn't work for something like this, I am DREADFUL at doing such things free hand, and it is such a time (and sanity) saver to let the Silhouette cut out my stencils for me. I need all of the time and sanity that I can get, so purchasing this machine was a small price to pay! :)
Screen shot 2011-01-13 at 1.09.32 PM.png

I picked out a basic font in the Silhouette Software, adjusted the size of the letters to fit my flags perfectly, and a few minutes later I had these great stencils! But you could easily cut these stencils out by hand or use any store bought letters to get the same effect.
Blog-2.jpg

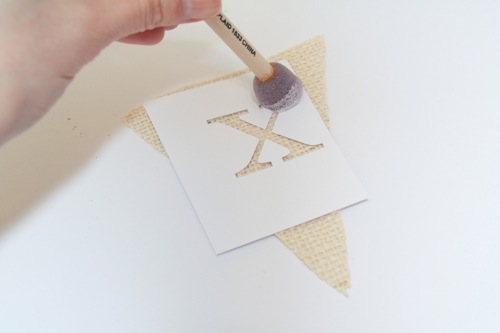
I made sure to use a piece of card stock for my stencils that had a glossy finish so that it didn't get soggy in the middle of my stenciling. I soaked my foam brush in Elmer's glue, and stenciled the glue onto the burlap.
Blog-3.jpg

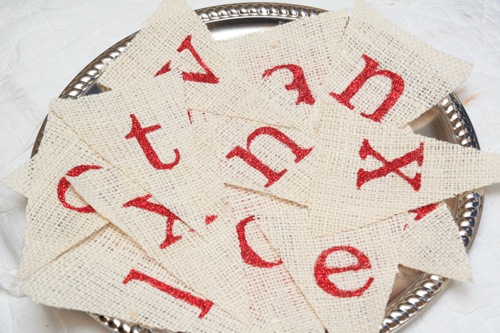
Keeping the stencil in place, I covered the glue in a small pile of fine red glitter, shook of the excess and set each flag aside to dry.
Blog-5.jpg
Blog-7.jpg
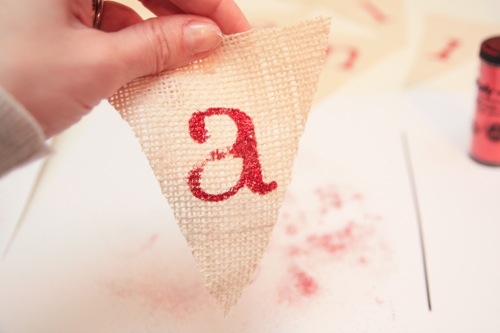
A few times I put on too thin of a layer of glue, but if you do this, don't worry!
Blog-8.jpg
I used a toothpick to apply a little more glue to the gap on the letter, added some more glitter...
Blog-9.jpg
and it was perfect!
Blog-10.jpg
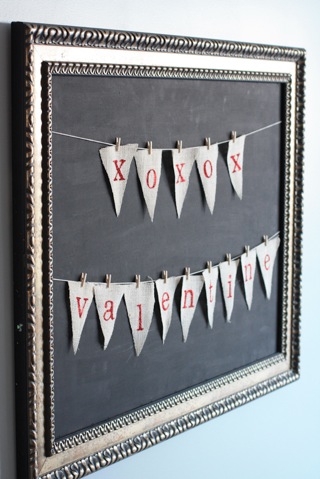
Once you have a fun pile of sparkly lettered flags, hang a string and clip them on! I'm using mine on my chalkboard, but they would look gorgeous across a mantle, window, or just along the wall!
Blog-21.jpg
I was originally thinking that I would glue my flags to the string, but since Valentines Day is still almost a month away, I know I'll switch it up and rearrange it a bit in the meantime. More than likely I will add a few photos of my valentines in between the x's and o's.
Blog-16.jpg
Look how perfectly the letters came out thanks to my Silhouette stencil!
Blog-17.jpg
Sharp lines and fun little detailed fonts, with swoops and tails. Just what I like!
Blog-18.jpg
I put one of these Valentine banners in my Etsy shop, so click here if you'd like one just like this.
Blog-23.jpg

I'll be linking my banner to these fun parties, so swing by for some more fun Valentine's Day ideas!


And I'll be back on Monday as usual. Have a great week!

Visit thecsiproject.com
E1025F317CFB5B8E9E5C526E5CC0F475 copy.png

Read more...

Monday, May 24, 2010

Re-vamp into a Blue Lamp


IMG_2279.jpg

I got these lamps forever ago, as in over a year ago, and have just been sitting on them waiting for just the right idea. Sometimes inspiration comes in the most unlikely places.

2010_04_13_8224

As in, Parents magazine, at Easter time. This is typically the magazine that I read to try to be a good parent, not for crafty inspiration, but sometimes you get a bit of both. For some reason, I looked at that string-wrapped-looking egg and thought not of eggs but, "I must do that to those lamps!"

ss_101534179.jpg

I will admit that my first attempt at these babies turned out to be a big fail, because in my excitement over finally having a direction to go with this project, I neglected to first dull the glossy surface of the lamps before painting them. Don't do this. A few days later you will end up with a very sad situation on your hands.

2010_04_15_8264.JPG

The second time around, I dulled the surface of the lamps with a fine sandpaper, covered the sockets and cords with plastic bags and tape, and then spray painted them with a white primer.

2010_04_14_8246.JPG

When the primer was completely dry, I got some raffia, wet it slightly and wrung it out well because I wanted it to lay completely flat against the surface of the lamp, and started wrapping. I wanted a crisscrossing kind of look, so I alternated between wrapping it just around the middle, and wrapping it around the top and then under the bottom of the lamp. When I got to the end of the raffia, I carefully tucked it under one of the first strands that was pulled tightly so that the whole thing wouldn't unravel.

2010_04_21_8370.JPG

I then pulled out my trusty Mediterranean spray paint (by Valspar), and got to work. I got down level with the lamp (meaning on the ground, but if you could elevate your lamp it will make this part easier), because I wanted to spray straight onto the raffia, as opposed to spraying from a top angle where the paint might run down underneath the raffia a bit.

I did 2 light coats, mostly because I was still nervous about the paint running. But it turns out that this was just enough.

When the paint was dry, I carefully peeled off the raffia strands, and held my breath. Luckily, dulling the surface this time worked! No little maroon spots were glaring up at me, just a fun blue and white pattern.

2010_04_21_8374.JPG

I love the texture that this approach provided! I followed up with a satin polyurethane for protection.

IMG_2265.JPG

What do you think? Aren't they fun?

IMG_2243.jpg

I don't have a lampshade "before" picture, but it was a basic shade that was yellowed with age and had a few stains. I covered it with some white burlap, which more than covered the stains, still gave me the light glow that I was looking for, and added just a bit more texture to the mix.

IMG_2280.jpg

I'm pretty pleased with the results. This is my first venture into anything to do with lamps, so now going to start looking at the other lamps around my house and to see how I can change them to give that space a little boost.


Visit thecsiproject.com

Read more...
Related Posts with Thumbnails