
Monogram Button Pillow
While I am enjoying my new little baby at home, I have a few bloggy friends stopping in to share some of their great ideas and projects. Today Kari has a great holiday gift idea to share.
Hey guys! I'm Kari, visiting LTC from my little blog, The Adventures of One Crazy Lady. I'm here today to share with you a great project if you're looking for a gift idea to make for someone you love this upcoming holiday season. One of my most favorite crafts that I've ever made is my buttoned monogram pillow. I decided to make one of these bad boys after I saw a few of them on Etsy and realized that it just couldn't be that hard. And trust me, it wasn't!

Introducing the monogrammed button pillow!
It was easy to make, just very time consuming...
Here's what you need to make your own:

1. A pillow form (I went with the 12x16 form)
2. Fabric (for my size pillow I went 3/4 a yard)
3. Buttons (I got mine off etsy)
4. A print out of the letter you're going to be monograming
5. A washable fabric marker
6. Thread and a needle (I used an embroidery needle)
Now the how to...

1. After cutting your fabric (I do the envelop pillow sham so I cut 3 pieces of fabric), take the front piece of fabric and using your print out and your marker, trace your letter onto the fabric. It should look like this when you're done:

2. After you've traced your letter, take your threaded needle and begin arranging and sewing your buttons onto your fabric:


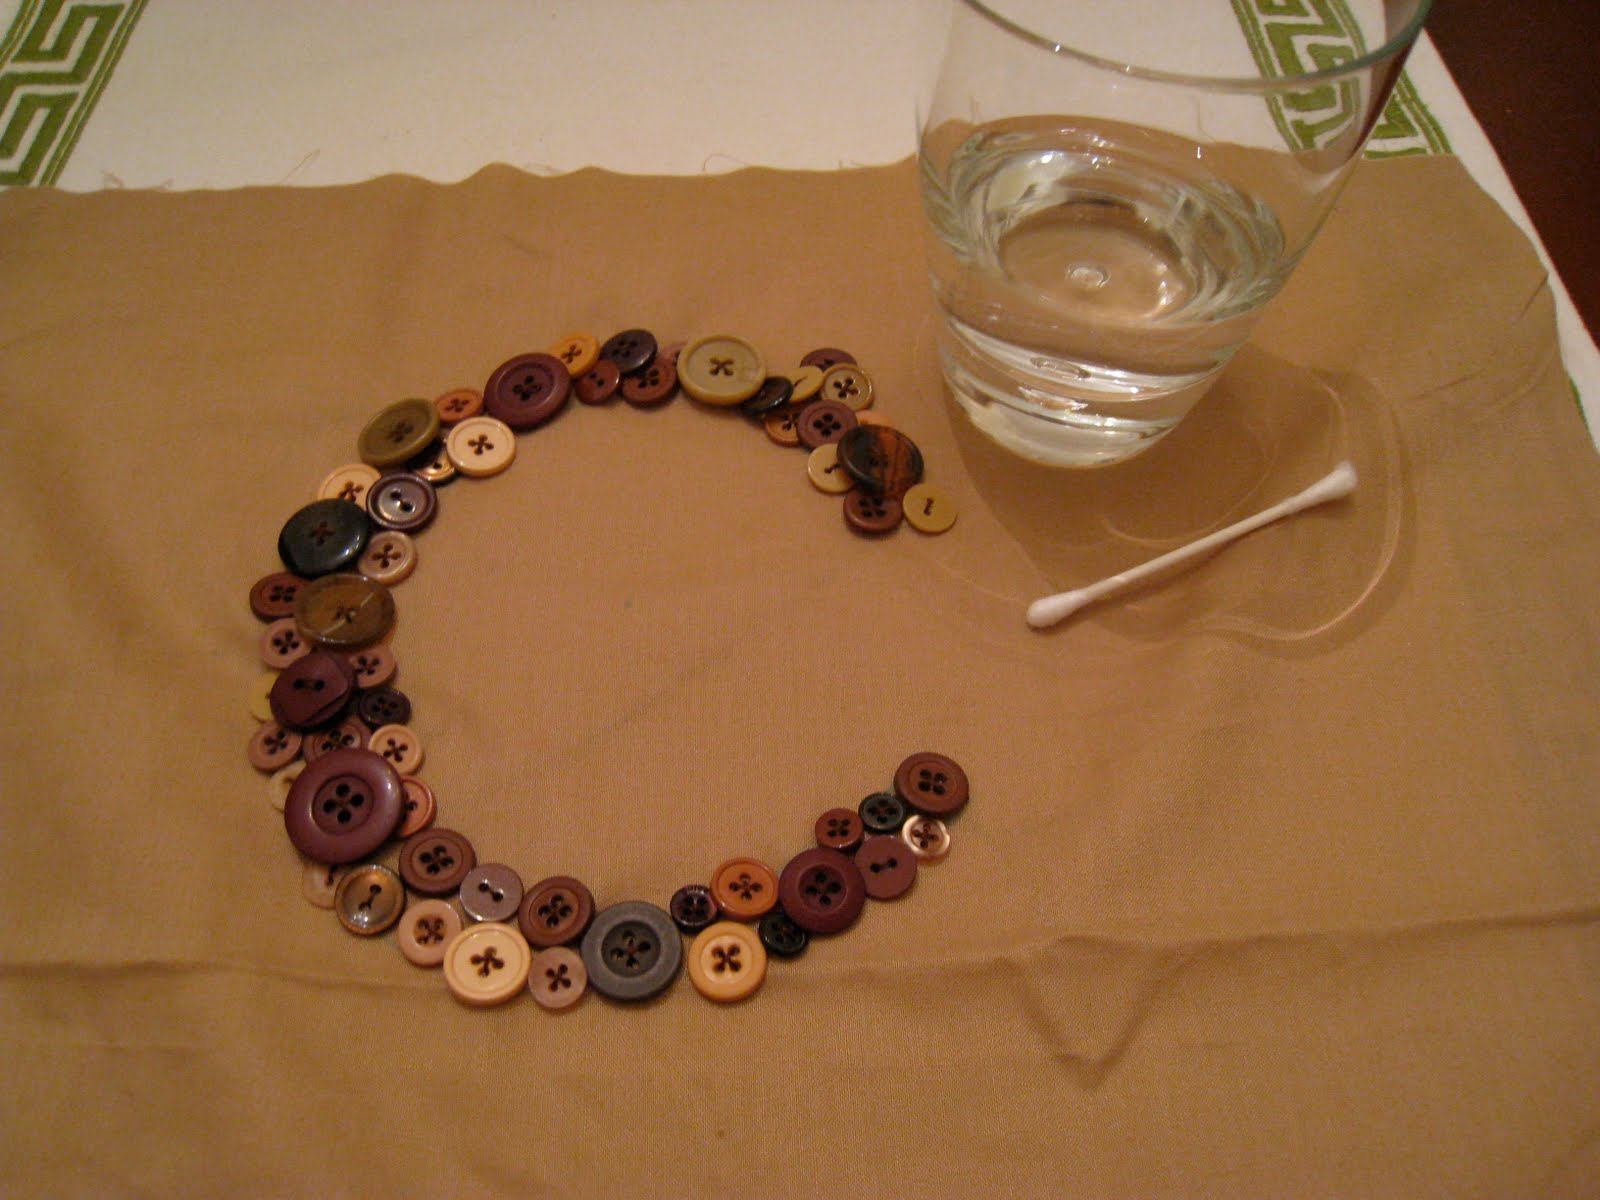
3. After you finished sewing on all your buttons, take a q-tip and some water and rub it onto the fabric to wash off the marker you used to form your letter. It should easily come off with a little scrubbing.
4. If you're making an envelope pillow sham cover like I did, you should have cut your fabric into 3 pieces. I cut mine into the following sizes: 13x17 <--front, 13x13 and 13x9 <--- the 2 back pieces that make the envelope sham. I then hemmed the 13" sides of the 2 back pieces to finish them off.

5. I took all of my 3 pieces and pinned them together right sides facing each other:

6. After pinning them together I sewed a 1/2 inch seam attaching all three pieces together:


7. After you've finished sewing the pieces together, turn it right-side out and admire your work:


Can you do this? YES! This was NOT hard and I have complete confidence in you! :) If you have any questions, please feel free to email me! And if you're looking for more fun pillow ideas, be sure to check out my blog for more ideas! I can't wait to see your very own monogrammed pillow!
Thanks Kari for coming by and sharing your pillow with us, I love it!


3 comments:
I LOVE how yours turned out! I saw some of these in a magazine a few months back and have been itching to make one ever since! I really need to get on that!
Love Love Love this pillow!
I have been wanting to do this and I love how yours turned out so much you have motivated me to get going on it!
Post a Comment