I knew exactly how I wanted to design our new nursery if we were having girl. I had a vision of everything I didn't do in my first little girl's nursery, and I wanted to do just that. It was going to be modern, fresh, and unexpected...
So naturally we went to the doctor for our big ultrasound to discover we were having a sweet little...boy! Don't get me wrong, I was very, very excited! I have definitely always wanted one of each, and thought having a baby boy was the perfect addition to our family. I did not, however, have a clear version of the nursery or what I really wanted. So naturally I went searching for inspiration. And let me tell you, I found it in a little known treasure...Restoration Hardware Baby & Child. I mean do you know how fabulous there nurseries are? It seems to me Pottery Barn gets a ton of hype in the blogosphere these days, (and don't get me wrong, I love it too), but Rh Baby & Child is amazing!
I can't wait to share with you the nursery we have designed from it's inspiration, including the bedding we chose, but for now I have a simple project to share that jumped right off it's pages to me: These vintage clipboards...
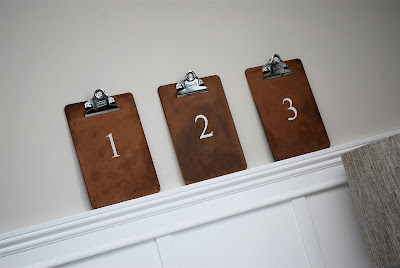
There are many ideas I used from this room, but I particularly love how the clipboards serve as a great and unexpected display space. For some reason it just screams little boy! Seeing as how I was fresh out of old, vintage clipboards, I decided I would just have to make my own. Here are a few quick and easy steps I used:
1) I purchased memo sized clipboards from Staples. I wanted something that could easily hold flashcards or pictures in the future. A traditional sized board seemed like it would overpower smaller displays, so I decided I could just add some larger ones later when we actually had some art work to display.
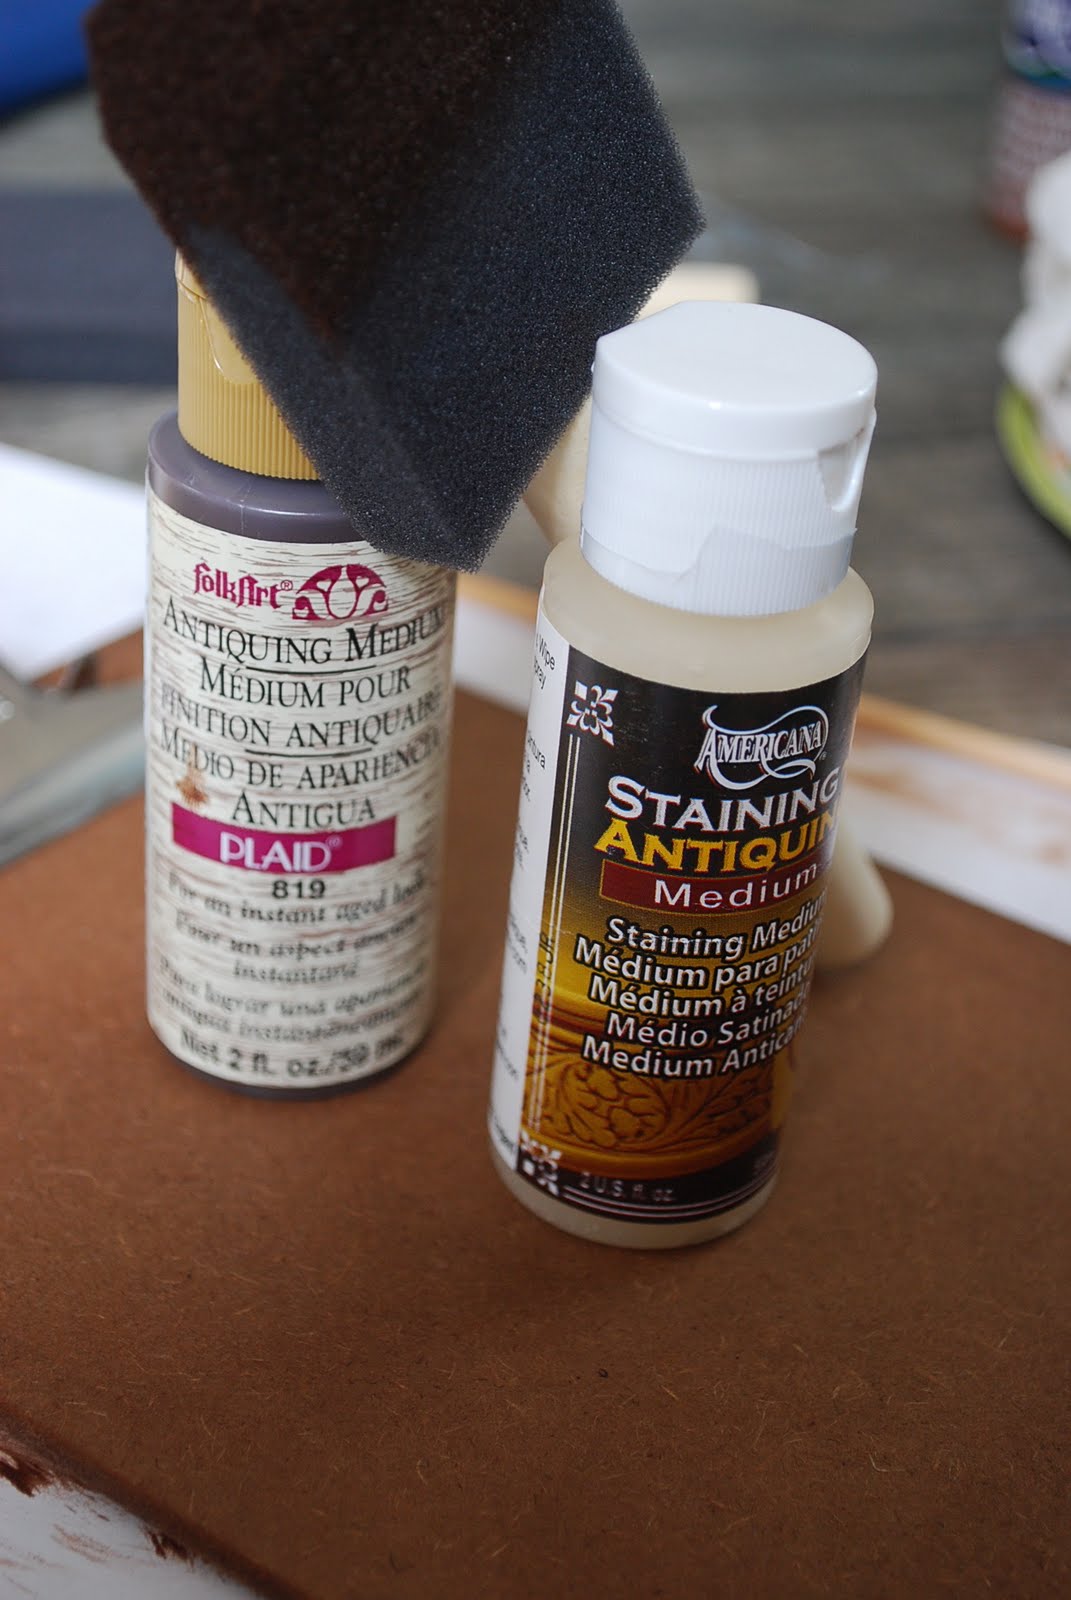
2) After some trial and error, I combined two antiquing mediums to get the look I was going for. I followed the directions from the back of the bottles for applying with a sponge brush, rubbing off, and rinsing while wet to get just the right look.
3) I wanted to add something to the boards to dress them up just incase I had nothing to display. I decided I wanted to add some simple numbers, so while the clipboard was drying, I turned to my
Silhouette studio to look for the right font. I then cut them out in
silhouette vinyl to create a super quick and easy stencil. This was the first time I have used the silhouette to create a stencil with vinyl, and I have to say it has revolutionized the way I stencil from now on! The pictures will show you just what you need to finish off this project!
Once I finished the first one, it was easy sailing from then on! I did all three in a matter of minutes.
(This picture really shows how the antiquing medium addeed some depth and texture to the very new clipboards.)
I decided to prop the clipboards up on the board and batten ledge just above the dresser, securing the stops with a very small 3M poster strip 'just in case.' I am loving the result (though I would love to find a quick and easy way to take the edge off those silver Staples clips?)
Happy Thursday!


9 comments:
soooo cute and perfect! love.
light grit sandpaper???
Perhaps just cover it with a rope-bow or variations of buttons? Nothing a little hot glue can't handle ;)
Love this look! I have been wanting to use clipboards in my decorating. So fun and neat to be able to put whatever you want under that clip! I wish I knew what to do with the silver clip. I got nothin'. : ) Baby Boy is going to love his room for sure!
treasures June 24, 2011 at 8:22 AM
Love these! I see the real old ones at Goodwill all the time. You could try rubbing some of the antiquing liquid on the silver clips and then rub it off; it might dull it a little.
Have a great weekend!
~ Julie
love the idea, i love old school house inspired styles. Maybe you could sand the metal lightly then wipe it with some watered down paint, either gray or brown, to create and antique look?
This is a really cool idea for a kid's room... or a teacher's classroom. (I'll be tucking that idea away until next school year.)I also signed up to get the RH catalog. Thanks for linking up!
Becca
Great idea! Lots of design
possibilities! Patsy from
HeARTworks
Love this! I was inspired by a catalog photo from PB of vintage clipboards, but like you, have none on hand. :) I thought it might be easy to antique new clipboards, and am happy to have found your instructions! Yours turned out great!
Post a Comment