Friday, May 21, 2010

Eyeglass Family Tree

So, Saturday I was beginning my normal morning routine of dragging myself out of bed to catch a yard sale and then hit all the Goodwill's. Today I was on a mission: cheap pairs of eyeglasses for today's project; well my version of the family tree which was inspired by a book I have called Photojojo.


A simple way to create picture frames from old eyeglass frames. The first thing you would want to do is collect old glasses that you don't use anymore or that are scratched (sunglasses would work too). I found mine at my one stop thrift store for $.99 a pair. (no luck at the yard sales)


I simply picked some photos that I wanted to use for my family tree and placed them behind the frames (just make sure the images you want to use fit accordingly, I developed wallet size photos). I wanted to replace the lenses, but it appeared that I was going to ruin the frames, this was the best solution for me.


Using a sharpie (high tech, I know) I traced the around the frame and then cut out my picture.


Here I am checking to make sure it fits...and it looks fine to me ;)


On the back I cut out decorative scrapbook paper to cover the back of the photos and to add a nice touch to the glasses.


With a dab of hot glue, the pictures were in place.


For the finishing touches I painted the pot white using acrylic paint ($.33 ). I cut out the number 3 from scrapbook paper, mod podged it on, hot glued the yellow ribbon around the top of the pot, poured rice in the pot to secure the tree branches I purchased from the craft store to represent my family tree. Last and certainly not least, I added my new frames to the branches.

I was thinking as the season's changed I could add more pizazz to the tree. Some lights, paper flowers possibly? Thoughts?

Until next time, have a great weekend. I am excited to link up to these awesome parties this week. Won't you stop by and check them out?!

Read more...

Thursday, May 20, 2010

Empty Frame Wall Art: Revised

This post has been edited. I couldn't look at the project below on my wall for another minute. I love it in theory, and it works in the craft room...but somethings you just can't change. Things like YOUR self. My entire house is decorated in shades of blue, gray, and neutrals. The color seen below was stressing me out!


So, enjoy below the BEFORE and AFTER of the empty frame art.
Before
After


Inspiration, where does it come from? Sometimes when I am having a dry "crafty spell" I go hunting through blogland. There are so many great ideas out there, and I love when I find the perfect one. Well, I was in need of some real inspiration this past week, and I found it here on Ucreate. Check out the 5th picture down. Let's all just come to the consensus now that it is way classier than what you will see in a minute, but we'll proceed anyway and see what I got into this week.

I've been looking for something to occupy the space of the guest bed in my craft room. Honestly, my craft desk used to occupy space in the guest room, but times have changed around here and I've got to say I like it! Anyway, this room has gone through many changes, and I was very unsatisfied by how dark the room still felt. How was I supposed to be creative in such a drab space? So, I set out to remedy this situation, using what Kari had discovered.

First, I used some great magazine's I already had, (and purchased some additional ones at a discount book store for $.50), to create a fun graphic for the wall. (Again, this has now changed, but just in case you like it...read on!)


I just cut the covers off and used a glue stick to attach them to two poster boards taped together. My little assistant helped me choose the perfect layout.


We mounted this, with 3M poster strips I had lying around, above the headboard.


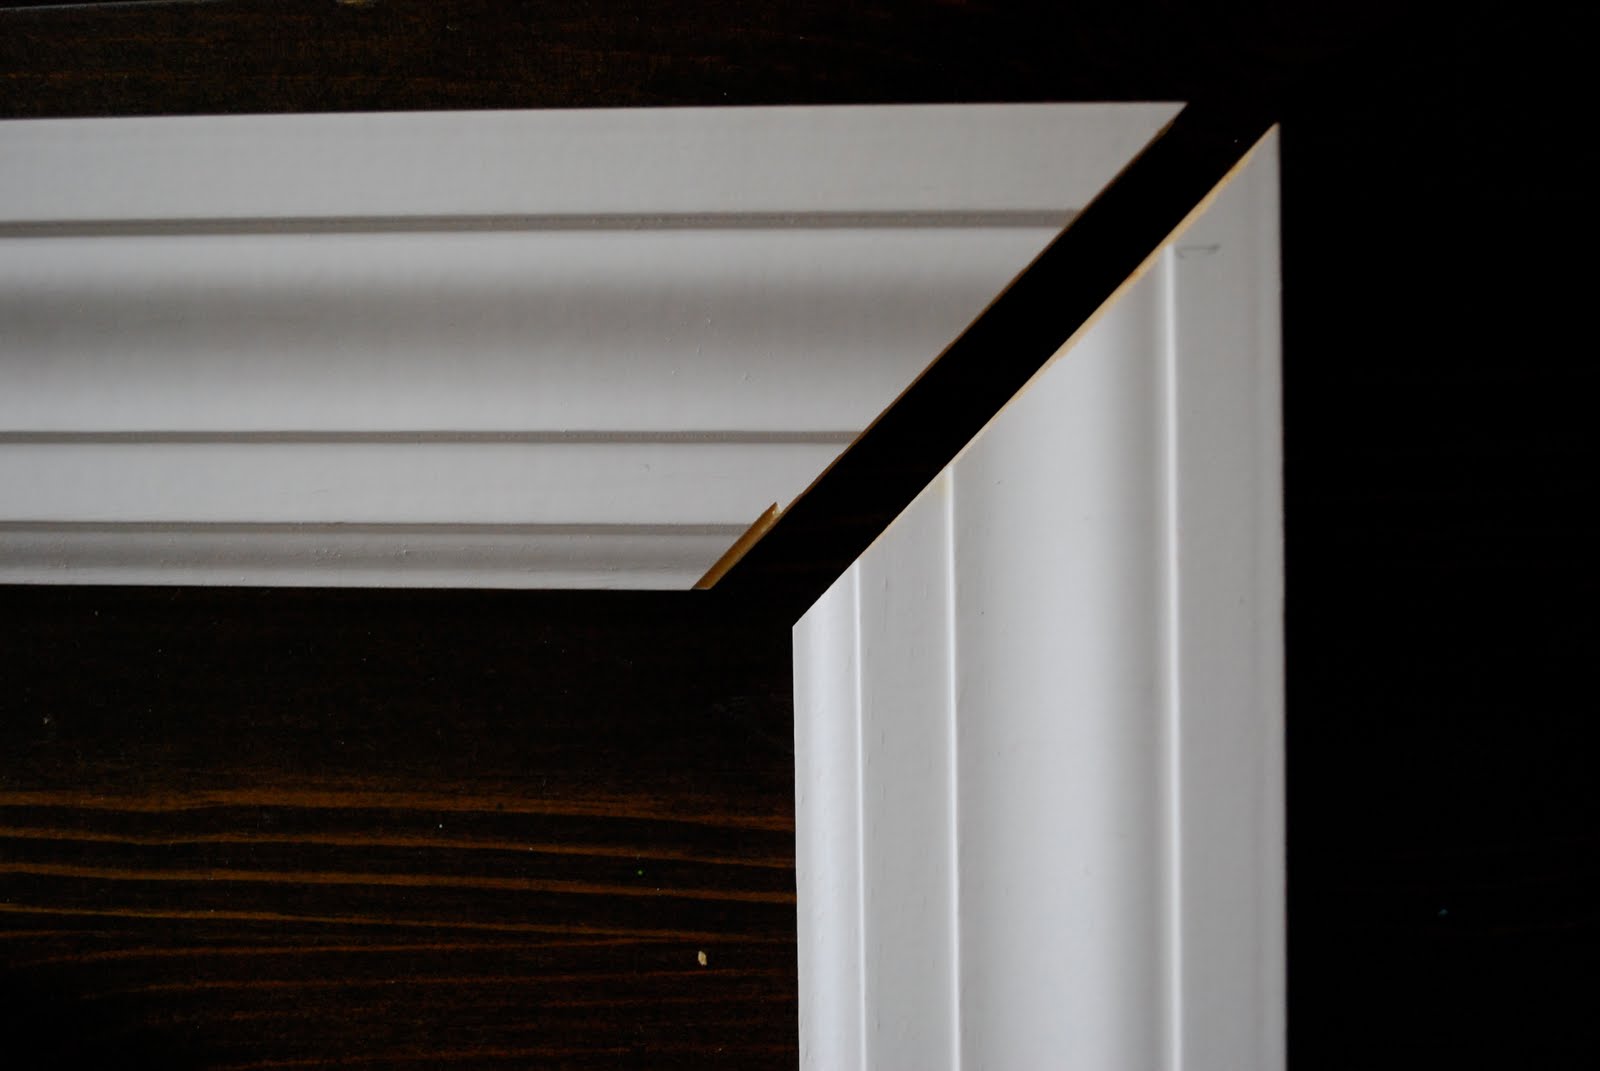
Next, I had to make a frame. I had planned on thrifting to purchase a giant old frame, but came up empty handed. ( I have to say for all that Goodwill offers, paying $39.75 for a giant frame there seemed a little steep to me still.) So, I had my husband cut some cheap chair rail for me into 3 foot strips. He used a table saw to cut the corners at a 45 degree angle.


Worried about splitting the wood with nails, I used the unconventional method of hot gluing wood to stick the frame sides together. It holds perfectly so I am pleased. I am totally aware that there are better ways out there to do this, but I went with the cheap, no additional materials needed, way to get the job done over here!


Next, all I needed to do was paint them the perfect cool blue, to go along with every other accent in my house. Perhaps it is getting a little monochromatic around here, hmmm?


When the frame was complete, I cut burlap strips from some left over scraps, and hot glued them to the back of the frame.


To hang the frame, I purchased a coat hook from a Target clearance aisle for $2.44 (win!). I screwed it into the wall, just below the crown molding, and...


Ta-da! Some bright graphic wall art was created using an empty frame and some recycled magazines. (Or other random paper wreaths and monograms you have lying around your house...)


Being the non-committal, A-type personality that I am, I have some mixed feelings about the results. So, let's lay out the pro's and con's and see what you think. (SO VERY non-commital, hence the re-post!)

Pro's
-It's big, and I LOVE big!
-Burlap ribbons make me happy!
-I'm in love with Martha Stewart, and now I get to be inspired by her everyday!
-I get to use a lot of exclamation points while posting this blog! yay!
-The frame can change forms a million times, and still be a worthwhile project!
-I got to recycle magazines!

Con's
-It's a lot of color. (Is that a con? Most of the things in my home are shades of blue, gray and something VERY neutral?
-It is not very sophisticated, and I am not generally that whimsical...hmm...
-I keep imagining the frame filled with one of my wreaths or some super cute silhouette plates. Now I am questioning whether or not I made the right choice going the graphic right?

Ohwell, for now I am just going to think I like it and be happy that my husband is too. (That DID NOT work out for me so well!) We can brainstorm later (aka, problem solved, for now!) Let's just check out what other great inspirations are floating out there in crafty world here.

I am pleased with the end result, even if it took a while to get here!


Happy Thursday friends!

Read more...

Wednesday, May 19, 2010

What I Like Wednesday: Yellow Love

I know that I just posted a few weeks ago about removing an offensive yellow color from my kitchen walls (see here if you missed it), so you might be wondering what this yellow love is all about.  I do LOVE my new blue color, it is better in a million ways.  But as soon as I did it, I started to see all sorts of beautiful yellow inspiration everywhere that I looked.

It turns out that yellow and I aren't actually breaking up, we just needed to spend some time apart so that we could remember what we liked about each other in the first place.

Like how sometimes the color is so bold that it catches you off guard, and you are surprised by how perfect it is.  I saw this arrangement on Becky Higgin’s site here, and thought that I would have put those flowers straight into a clear or brown vase, but that yellow just makes the whole thing pop.  That vase actually makes the arrangement, which is a pretty big compliment because the flowers are incredible.

centerpiece

I also love how yellow can be so calm and soothing. (That is, when it's not sucking the soul out of your kitchen with an angry orange glow...let it go Erin, let it go.)  Anyway, I love this peaceful yellow bathroom, from Cottage Living.  I just want to take a book and some bubble bath and hang out in there all day long.

cottagelivingyellowbathroom_thumb

Or how a subtle yellow can be so beautiful.

captivatable_thumb.jpg

somersetcumberlandcabinet_thumb.jpg

Sometimes yellow can bring a fun and funky vibe, like on this adorable sign, which you know I am a sucker for, courtesy of Meet Virginia here.

IMG_1802.jpg

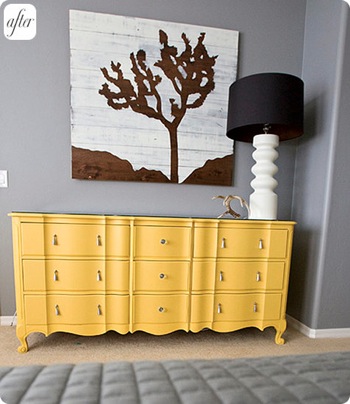
It also turns out that a good shade of yellow can work well in a room with grayish blue walls, and can remind you of why you used to think of it as a color that was sunny and happy.  I found this dresser makeover at Design Sponge.

michelleafter1.jpg

Perhaps I will bring some yellow back into my kitchen.  Not on the walls because I already know that it can't be trusted there, but in a few small places.  We'll see how it behaves and then maybe move forward from there.

Do you have a place in your home where the yellow is really making the space work?  If so, we'd love to see it!!  Have a great week!


E1025F317CFB5B8E9E5C526E5CC0F475.png


Read more...

Tuesday, May 18, 2010

Quick & Easy Picture Jars

My sister handed down these Christmas cracker jars to me awhile back. I thought they were adorable but...


seasonal and I wanted to use them year round so I simply decoupaged pictures of my babies on them. I do not have pictures of the process but it is pretty self-explanatory. I printed the pictures off my computer just the size I needed to fit the jar. I got out my handy Mod Podge and attached them right to the jars with a layer over top to keep them nice...


These actually ended up in their closets for now because they are large and glass so I did not want them to be easy to access. Someday they will be on display.

Big Sister's jar holds her mini stuffed animals...


Little man's jar holds his blocks...


And just for fun since I have a slight obsession with jars, here are some other ways I fill them up in my home...


I love the endless possibilities with jars. They are so versatile fitting into any decor and so much fun! I have a collection of bouncy balls started (thanks to my sister) for a jar in Tyson's big boy room someday. So, tell me what are the jars in your home filled with?

Won't you join me at these link parties by clicking here? They are so much fun and filled to the brim with inspirational ideas.

Happy Tuesday!

Read more...

Monday, May 17, 2010

Express Necklace Knock Off

2010_04_27_8792.JPG

One bad thing about successfully knocking off a product that you saw in a catalog or store, is that you start to feel this sort of power over everything, and start looking for other items that you want and can make yourself. I had just such a situation on my hands a few weeks ago when I was strolling through the mall and saw this.

18880857235_ORIG

I saw this long necklace and immediately started thinking about how much cuter all of my summery tops would be if accompanied by it. I remembered seeing Vanessa of V&Co spray paint some wooden beads on SYTYC, and I already had the perfect color of spray paint, Mediterranean by Valspar. I had a few wooden beaded necklaces that I took apart, and used Vanessa's method of threading one bead onto a toothpick, with a little tissue paper inside to keep it from falling down.

2010_04_15_8269

I sprayed one side and let it dry for a few hours, and then flipped the beads and sprayed again. It took 2 coats on each side to make sure that every last spot was covered, but I did a 3rd coat to cover one round of impatience, and the fingerprint evidence of someone who didn't give the beads enough time to dry before trying to flip them to the other side. :)

2010_04_15_8274

I ended up with a handful of gorgeous, shiny, perfect-summer-blue beads.

2010_04_19_8283

I didn't want my necklace to be exactly like the Express version, which only used medium sized beads, because I like the look of having a few larger beads in the middle and slightly smaller beads towards the ends, so that is what I did.

2010_04_20_8328

I laid out the beads as I wanted them on a towel so that they wouldn't roll away, and then threaded them on some silver beading wire. Luckily I had a pearl necklace that wouldn't miss one of it's large beads, and I liked that aspect of the original Express necklace, so I added it as well.

2010_04_20_8343

I got a long gold necklace from a thrift store for $1, cut one of the chain links so that I had a long strand, tied off the end of the silver beading wire and then aligned it with the wire that was holding the beads and twisted it around several times so that it wasn't sticking out.

2010_04_20_8346

One of the wooden necklaces originally had these tiny gold beads on it as well, so I threaded the excess wire through that before the wooden beads make the knot "disappear."

2010_04_20_8353

I looped the chain and bead strand over my neck until it was the length that I wanted, and then cut the chain at the desired length, and tied up the second end the same way that I did the first end. I then slipped it over my head and burst into song. I chose, Is This Love by Whitesnake, because I think you can’t really beat 80s ballads for a moment like that, but this part is really your call.

2010_04_27_8837.JPG

What do you think? Wouldn’t you have sung too? Admittedly, it’s not quite as gorgeous as Express’ version, but now I don’t have to try to justify spending $40 on one necklace.

2010_04_27_8869

I ended up with a lot of leftover beads because it turns out that when you paint 2 necklaces worth of beads, you have enough to make…you guessed it, 2 necklaces. My second one I put on a silver chain and included a few of the silver beads that were originally on the silver strand just to dress it up a bit.

2010_04_29_9031.jpg

Also, I have some fun news that I am incredibly excited about...I now am the very proud owner of an etsy shop!! Allow me to introduce you to Blues and Branches!

blue1

Over the past few months of participating in the DIY and crafting community, I have had numerous people make comments like, “I really like that, but don’t have the time/patience/energy to make one for myself.” To those people I now can say, “Well, since I’ve already worked out the kinks, I’ll just make one for you.” I’m pretty nice like that. :)

Picnik collage 1.jpg

I filled my shop with a few of my favorite items that I have shared here, a few of the items that people asked me the most about, and also a few other little gems that I’ve been working on, including these necklaces! I would be happy to discuss a custom order with you as well. Please take a look at my tiny little corner in the world of Etsy here, and let me know what you think!

Picnik collage2.jpg

And as always, I’m excited to link my little necklace to some incredible parties this week. Please check out a wealth of ideas at the links listed here, and the CSI Project.


Visit thecsiproject.com

Read more...
Related Posts with Thumbnails