We Have A Winner!
The winner of a copy of Making a Mess and Meeting God is comment #14,
 which is Carolyn!
Carolyn, send me an email with your address and I'll make sure you get your copy. Congratulations!

 which is Carolyn!
As I cleaned out my basement and created my "keep" and "sale" piles (as I do every year). I rummaged through the sale pile once more.
I drug out this globe which I had originally planned to take into my classroom several years ago. As I wiped the cob-webs off I decided to put it in the keep pile and keep it I shall.
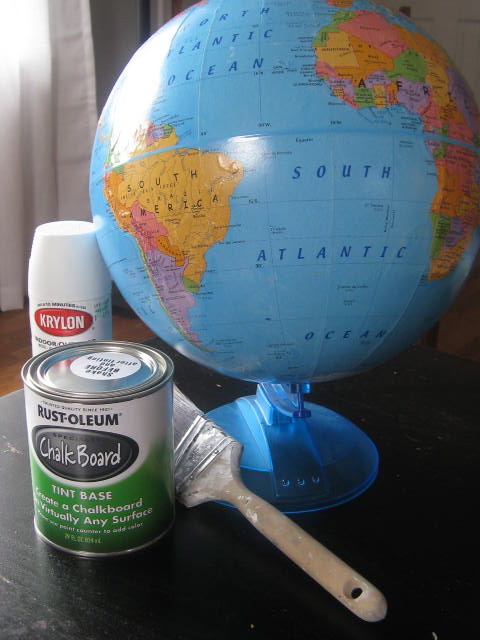
This simple craft calls for just a few supplies: chalkboard paint (sold in quarts $11.00 at Home Depot..ouch), a globe, some spray paint and a brush. (chalk too!)
I first painted the globe with several coats of the chalkboard paint.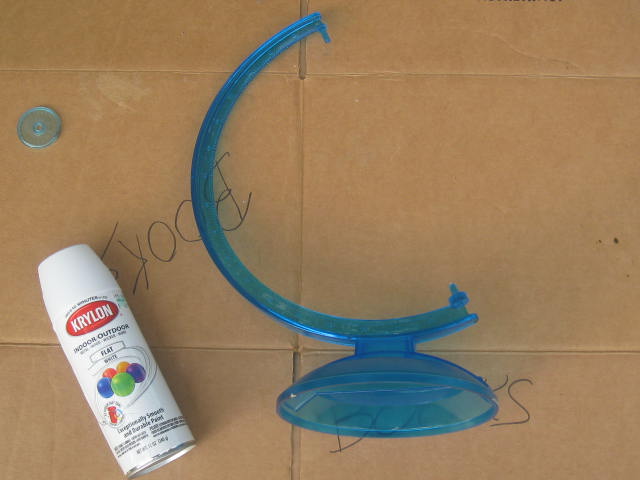

Once the paint was dry I took the globe apart and spray painted the base with white Krylon spray paint.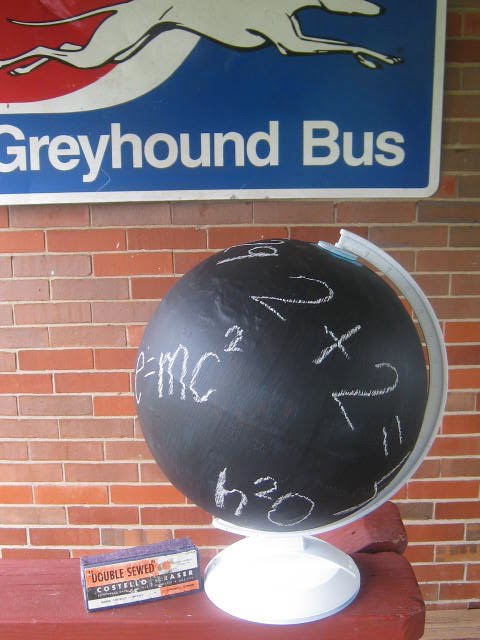
And last I simply added my drawings to the piece.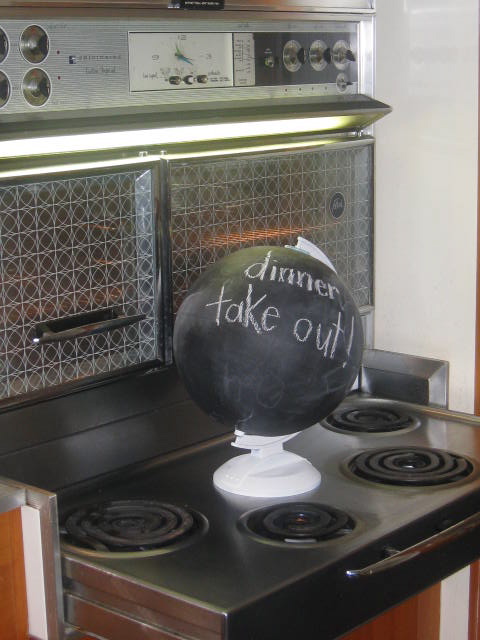
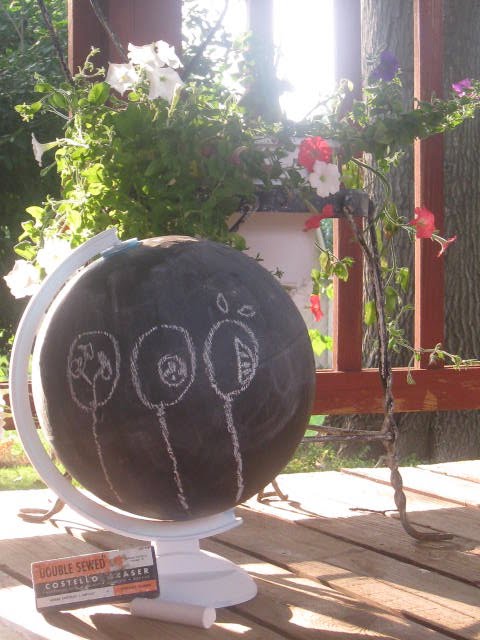
A simple art piece for my home.
I will be linking up to these parties this week and I look forward to showing you my Rt 127 Yard Sale finds the next time we meet!
And, look me up at the CSI Project for Kids Crafts this week!
![]()

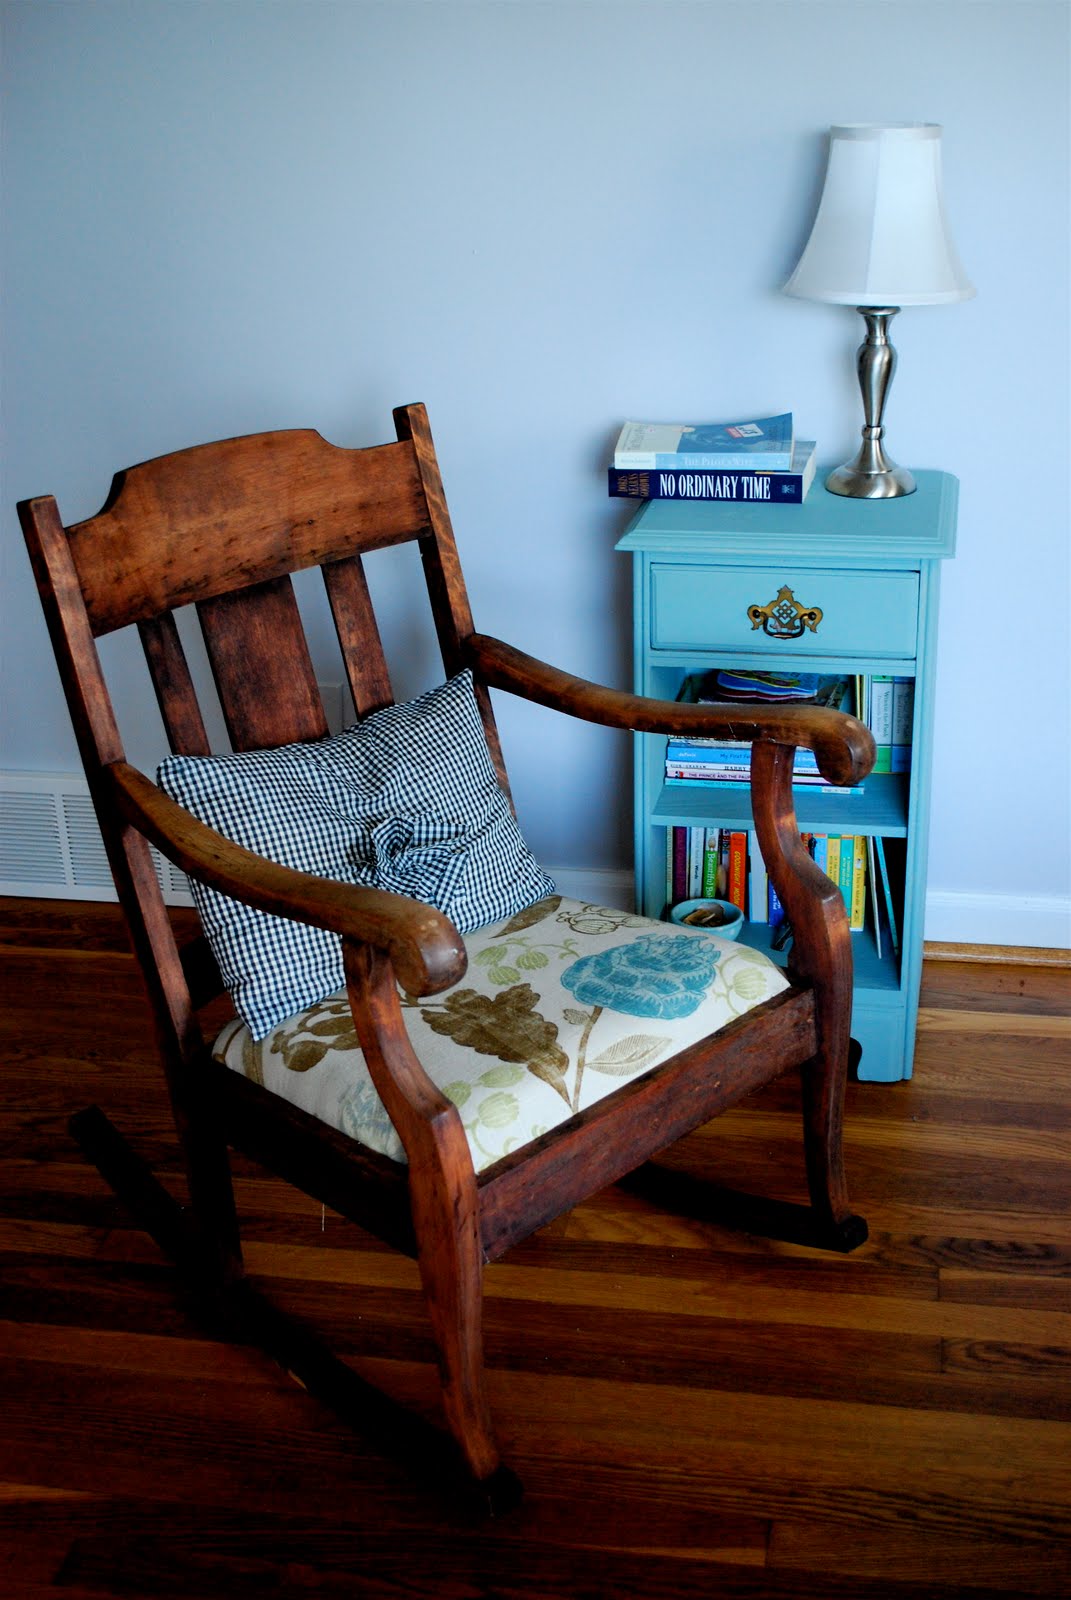
A little bit less than a week ago I wrote this plea regarding my "Random and Beige" living room. Well, perhaps there is a reason my friends and husband think I am crazy, because over the weekend, in less than 4 hours, I redid the entire space. I kept going back to the pictures and listening to the advice left by others and I just couldn't stand it! Once my pictures were out there in space, I just could not stand the unrest I felt.
So, on Sunday, my husband and I took advantage of a few hours of babysitting and cleared out, repainted and reorganized our living room. Here is the result:


 Read more...

A Review of Making A Mess and Meeting God, by Mandy Smith
I feel like I should confess, upfront, that I am not a person who typically looks for alternative forms of worship. If the minister says something like, “Okay, we’re going to do something a little bit different today…” my husband and I automatically look down at our little nursery buzzer, silently (or not) begging it to start buzzing. We console ourselves with, “We’re just a couple of introverts,” to squash any guilt we may feel over just wanting to avoid the uncomfortable situation that is rapidly coming our way.
Ironically, this is one of the reasons why I loved this book. If an author can make my grumpy, foot-dragging, introverted self feel inspired to step out of my comfort zone, then this author is obviously very talented and has some good things to say. Such is the case with Mandy Smith.
Mandy is an Associate Pastor at University Christian Church in Cincinnati, Ohio. She did her BA in Biblical Studies at Cincinnati Christian University, and was Valedictorian. She and her husband are originally from Australia, and currently reside in Cincinnati with their two children and one dog. She is in charge of the worship service as a part of her current role, has served on worship teams in the past, and was the creator of “The Collect,” a citywide trash-to-art project that took place in Cincinnati in 2007.
Format:
Mandy's sets out to help readers discover the potential that ordinary activities and daily life have to teach about God in a new and deeper way, and much of this discovery is done through various forms of art. She hypothesizes that, “If we explore new opportunities to find the divine in the ordinary, and through a little artful play, then we will discover new depths in our comprehension of and communication with God.”
Mandy leads the reader through a collection of object lessons for grown ups. Each of these lessons is explored in two main forms. First, there is a purposeful effort to find God in the everyday moments and activities. Second, there is exploration through art. Each chapter has a different set of themes that it explores, culminating in a re-evaluation of what one thinks about God, shifting from a working toward him mindset, to working out how to realize that he is already there.
My Highlights:
Introduction of “Recipe Cards”
In the first chapter Mandy describes a time when her church was exploring the topic of spirituality. They agreed that spirituality wasn’t necessarily about going on a quest to find God, but about being aware of his presence in their every day lives. The ministers invited the members of the congregation to submit the ways that they experience God through the ordinary. In light of churches often putting together recipe books by compiling the members’ favorite recipes, they called these their “recipe cards for spirituality.” These recipes are peppered throughout the book, and I found them to be engaging, encouraging and often examples that I really resonated with.
Biblical Teaching
Each chapter begins by introducing the themes and passages that the lesson is based upon. What follows is poignant teaching, thoughtful investigation of these themes and really practical means of application. Admittedly, with a professor for a husband, I hold education and knowledge to a very high regard; So I was encouraged to read a good balance of biblical teaching and creative challenges. Neither was slighted in favor of the other.
Awareness of Potential Awkwardness
This was a bit of a big one for me, because of the stress I described at the beginning of this review. Mandy obviously knows that there are hurdles when dealing with a subject as personal as finding God, particularly when looking for alternate means of doing so.
She discusses obstacles such as opening oneself up to creativity, how to deal with the dynamics of group settings, helping introverts to feel comfortable, varying skill levels, people who are tied to their traditions, distractions in a group setting, the “cool factor” involved in being non-traditional, just to name a few. She addresses these issues head-on and with helpful suggestions for moving beyond them. Furthermore, in each experiment, she provides possible adjustments to make it work for an individual, for small groups or for corporate worship settings.
Challenging and Relevant
Though the topic of finding God is not a new one, Mandy’s perspectives are unique and very relevant.
The ideas are refreshing; much like talking to a friend with the rare gift of insightfulness and thoughtfulness. It is written with such clarity that I found myself underlining sentences periodically, thinking, “Yes. She put that perfectly.” The experiments are applicable and interesting, and sent me rushing out to the store and scrounging around the house for supplies so that I could try them out.
Addressing the Big and Small Picture
When I originally looked at the book, the title Making a Mess and Meeting God made me think that it would be full of various creative projects to help a person become more aware of God’s presence. I was right, but there are also broader applications. “The mess” also is in reference to the mess of our world or the various messes in our lives, and Mandy leads us to find God in those as well.
Who is This Book For?
I would recommend this to anyone who is looking for encouragement or new ways to think about the Christian life. With each chapter as an object lesson, it’s a good choice for ministers or small groups.
Though it may naturally appeal to people with some interest in art or creativity, the applications are relevant to all.For more about this book, including the option to purchase, click here.
How do you find God in your every day experiences?
Leave a comment below for a chance to win a free copy of Making A Mess and Meeting God.


This is one of those projects that I almost feel a little sheepish writing a tutorial for, because it is so very basic, and you can probably guess how I did it by looking at the final picture. But while some projects sit in my mind for a few months of pondering, gathering materials, and working at them a little at a time, other projects come together out of necessity, in a single nap time, with materials scrounged up from around the house and $3.00 at Jo Ann Fabrics. Like this one.

As I stated last week, I have recently moved my craft room into our old office and moved "the office/my husband's stuff" out. However, he kept the bulletin board and pictures that I had in there, so I set out to get myself something similar. So I repossessed a frame from my son's room and got to work.
I'm still trying to make the room a bit more feminine and inspiring, so I got some pretty blue damasque fabric from JoAnn's and go to work. I didn't have any foam board, so I just covered the original art piece that had been in the frame with fabric batting. It was too thin (and sturdy) for staples, so I just hot glued the batting down about every 3 inches, which did the trick.

I cut my fabric about 1 1/2 inches larger than the batting, because I know that I will eventually re-do this board, and wanted to be able to remove the fabric easily while leaving the batting in tact. So I glued down the fabric in a similar fashion, pulling it snugly as I went.

I wanted to be able to change out my photos easily, but I was looking for something slightly different than the typical memo board, so I thought I'd make a little clothesline. I got some cotton twine and hot glued it to the top corners of my frame pulling it pretty tautly. (You may want to try hanging a few pictures from your line and see how low it dips before you glue on the second side. Photos and clips are surprisingly heavy on a little line like this.)

I then popped the fabric-covered board into the frame and tested out a few photos.

I used these tiny little clothespins on my line, which are a little smaller than the pad of your thumb. They are ADORABLE! When I got them I had originally planned on gluing little rosettes or something fun to the top of them for an extra embellishment, but I ended up loving them as is.

Once my photos were up I realized that the pictures that had been printed in "landscape" left enough room on the board for a second row. So I added a second string about halfway down the frame for another row of photos.

I was so happy with how the fabric backing provided a fun "mat" for the photos. It was a great alternative to matting a bunch of the pictures in little frames and grouping them together.

I love it! It was one of those happy projects that is easy, cute, cheap and functional.

I'm linking to these incredible parties here.
Also, I'm sharing my tutorial on Freezer Paper Tote Bags over on Just Another Day in Paradise's Christmas in July party! If you missed it the first time around, click here to see it. Actually, there are tons of great ideas over there, so you should probably visit no matter what, and start thinking about and creating your Christmas gifts now!

Read more...
Our winner of a stencil from Cutting Edge Stencils is comment #52,

which is Kristen!

Please send me your email address so I can put you in contact with the people at Cutting Edge Stencil. Congrats!!
Thanks to everyone who entered the giveaway!

Erin received such fabulous feedback and great ideas last week that it inspired me to ask for your help myself. I have been dying to make some changes to continue updating my living room and thought I could ask for your help.
Okay, so in order to write the post I truly had to overcome my fear that you might see how terribly random and beige my living room is and just stop reading what I am up to all together. I promise, I have much better rooms in this house! So with that out of the way, we'll move onto my dilemma.


 Read more...


