I'm so excited about our guest blogger for today, Ashley from Little Miss Momma!
A few reasons to love Ashley: She's adorable, she puts together cute outfits and then takes flattering pictures of herself in them, she shows you how she accomplishes this stellar self-portrait feat, she's honest about her doubts and struggles as a mom, she has a secret that she shared bravely with her readers. Plus a million more! Truly, I get completely sucked into Ashley's blog every time that I visit, and end up circling around her past posts. She's sweet, funny, relatable, and has a cute kid that cracks me up.
She also has the cutest Etsy shop! Check her out here.
Thanks for posting Ashley!
Anthropologie Knock Off
Vintage Yo Yo Earrings
and I am super pumped to be guest posting today!
This is me:
A blog where I talk about my life lessons as a momma-in-training
{with some crafting during nap time}.
then you know I love me a good knock off.
And naturally, one of my favorite sites to get ideas is Anthropologie.
I stumbled upon these beauties, and knew I wanted to try my own version.
So I created a super simple vintage yo yo bobby pin tutorial:
I loved these bobby pins so much, that I became determined to find another fun use for my vintage yo yo's.
Anthropologie Inspired Vintage
Yo Yo Dangle Earrings:
Let's make a pair together, shall we.
Materials:
Two 1.5 inch diameter yo yo's
Two 8-10mm jump rings
Two earring attachments {available at your local craft store}
Pliers
Needle and thread
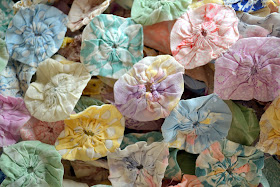
In my family, we have a Yo Yo quilt that has been passed down for 4 generations. It is made with vintage fabric, and it makes my heart swoon. The only problem, it has begun to tatter and fall apart. And the girls in our family have been trying to find alternate uses for the classic yo yo's. So I very carefully used a seam ripper to remove a handful of yo yo's from the outer edge of my blanket--to use on this vintage project.
And now, for the tutorial:
1. Use your pliers to connect the jump ring and the earring.
2. Thread your needle, tie a knot at the end, and pull the needle through the back side of your yo yo, in the spot you want your warring to dangle.
3. Now, sew the jump ring into place. I looped the thread around the jump ring about 10 times so that it was secure.
4. Complete the same steps on the second yo yo, and that's it.
Crazy easy, right!
Stop by Little Miss Momma any time and check out some of my other favorite tutorials like my Anthropologie Inspired Pom Pom necklace {no sew}, and my makeup tutorial.
Use the code: HAPPY
for 15% OFF
Thanks so much for having me today!
xoxo, Ashley


LOVE Ashley. And these earrings are swoon worthy! LOVE!
ReplyDeleteI am IN LOVE!
ReplyDeleteLisa
www.pickfair.etsy.com
Adorable! What a great tutorial!
ReplyDeleteThese are adorable! I recently did a tutorial on a yo-yo bracelet
ReplyDeletehttp://lacee-mommaslikeme.blogspot.com/p/tutorials_05.html
Now I'm going to have to make me a matching pair of earrings!
i love these, they are so cute!!
ReplyDeleteI love Ashley!!! Great tutorial :)
ReplyDeletenew follower via LMM! great to have found your blog~
ReplyDeleteThese are so great! I love the clips and the earrings. I might just have to try my hand at this one too! Thanks for such a great tutorial!
ReplyDelete