Saturday, March 19, 2011

Cutting Edge Giveaway Winner!

Congratulations to #117!!

Our winner is:
roweaglejacket who said:

Love the The Georgian Ceiling Medallion Stencil and the Parsley blooms at cutting edge stencils.

March 16, 2011 5:52 PM


Send me and email or a comment with your address and we will get your stencil sent right out! Thanks to everyone who participated! Have a wonderful weekend!

Jessica

Read more...

Friday, March 18, 2011

Last Day for Cutting Edge Stencil Giveaway!!

BUTTONgreen


I just wanted to remind everyone that today is the LAST DAY to enter to win a giveaway from CUTTING EDGE STENCILS!!

Click here for details and to enter to win.


The giveaway will close today at midnight and the winner will be announced tomorrow.


Good luck!!

Read more...

Thursday, March 17, 2011

Shut Up and Sew: Ruffled Flower Brooch

After I got a sewing machine for Christmas from my wonderful mother and father in law, I couldn't wait to put it to good use! Unfortunately for me, first I had to figure out how to use it. I have always been a little scared of sewing machines, worried the thread would get tangled or I would break it some how. Once I figured out how to thread the machine (a task that definitely made me swear and almost made me throw in the towel), I practiced nothing but straight stitches for a good while. Once I felt pretty confident with those, I started playing around with small things, and this ruffled flower brooch was the first thing I came up with.

Now, I realize that by no means is this original. There are so many versions of fabric/ flower brooches out there and some MUCH cooler than mine. So, that in mind, this is DEFINITELY a tutorial for beginners like me. People who would love to figure out a quick and easy way to make a little statement piece.

Here is what you do:
1) Cut a piece of fabric at least 2.5 inches wide and 2 feet long. (The wider and longer the strip the fuller/ easier to work with the flower becomes.)
2) Fold the strip in half, inside out and long ways and sew a simple, tight, straight stitch along the outside edge to create a tube.
3) Flip the tube right-side out. (The purpose of these steps before you get to the actual ruffling is to create a finished, thicker ruffle. I hate having edges fraying on a finished fabric project. This creates a smooth, fuller edge as opposed to a frayed, unfinished look.)
4) Next, you will sew the stitch that will be used to gather the ruffle. (After attempting at least 4 other ruffling techniques, this is still the most consistent method for me. It requires a little more time and patience than others, but if done properly it works and produces great results each time.)

To begin, set your top stitch width the highest your machine will go. (My machine goes up to 5.0, I believe some will go up to 6.5 which would be even easier.) I still use a simple straight stitch.
5) Flatten your tubing out with the seam you created either directly in the center, or slightly off center. (Doing it different ways produces different looks. Centered gives you fuller edges, off center gives you and extra ridge and a little more texture/ visual interest. Also, off center can be easier to pull/ ruffle.)

Sew a wide, straight stitch down the middle of your tubing (no matter how you positioned your seam, make sure you are now stitching down the middle of your flattened tubing, to create equal edging on both sides.)
6) Tie your threads in a knot at one end of your tube.
7) At the other end, begin pulling one thread and cinching your tube slowly down the thread little bits at a time. (You will have to 'test' each thread to see which one pulls the easiest. This is how you know I am a beginner too! I have NO CLUE why one works better than the other, but I haven't found a consistent clue to hang my hat on yet.)
Remember, this will take time and patience. Your fabric should move pretty easily down the thread, but if you put too much tension on your thread you will break it. In the beginning, I broke 1 out of every 3 I made and I thought I might go CRAZY! I have gotten much better since then.

(You will want to gather this ruffle as much as you can until it starts circling around.)

8) Now that the work is over, the fun part begins: Styling your flower. Basically, there is no formula to this. Just fold over one end of the ruffle and begin twisting, gathering and wrapping the ruffle around the center. As you go, either secure your gathers with hot glue or hand stitching. I have used both and prefer the overall look of the hand stitching, but the hot glue holds extremely well, depending on what you are using your brooch for.

9) Cut a circle from a coordinating fabric and attach it with hot glue or stitching from the back.

10) Finally, attach an alligator clip with hot glue and another fabric circle.


And that is it! Now just clip it on to anything and everything, sit back and enjoy!

Despite the other great options for fabric brooches/ flowers out there, I LOVE how full and finished these look!


Thanks for joining me for my first attempt at a Shut Up and Sew post. I can't wait to come back and share with you other things I've been making with my new machine!

I'll be linking these parties this week. See you there!

Happy Thursday and Happy St. Patty's Day too!

Read more...

Wednesday, March 16, 2011

Cutting Edge Stencils Giveaway!

Last week I shared with you the Large Paisley Sari Wall Stencil as I created a Stenciled Table Runner (see the full post here)


If you haven't been to Cutting Edge Stencils' website in a while, you really need to check them out! The stencils are to die for and they are so versatile! They have just added a ton of new stencils in the last month or so and I'm sure you will love them!

These are a few of my fav's:


Okay, ready for the giveaway? You'll have 3 chances to win!

1.) Become a follower of Lemon Tree Creations (or let us know that you are one).

2.) Like us on Facebook or follow us on Twitter. Leave a comment to let us know you've done so.

3.) Go to Cutting Edge Stencils website, browse around and tell us your 2 favorites. Good luck choosing just 2!!


The giveaway will close on Friday night at midnight and the winner will be announced on Saturday morning. Good luck!!


Read more...

Tuesday, March 15, 2011

What's For Dinner? - Meatloaf

I have so many favorite recipes that I decided they should be shared with our fabulous readers.  So about once a month until I run out of good ones, I am going to do a series on "What's for Dinner (or breakfast or lunch)?" and I would love to hear about it if you give one a try!

First up is meatloaf.  My sister gave me this meatloaf recipe awhile back after I ate it at her house and loved it!  Don't let the word meatloaf fool you, it is amazing, trust me.  My Avery has already requested it for her birthday dinner later this month.  She says this is her favorite food.  She always wants seconds, and sometimes even thirds when I make this meal.  Sometimes, we have to actually cut her off.  I don't know if it is the sweet taste of the preserves or what but she LOVES something about it.  Any meal that makes my 4 year old clean her plate is worthy of sharing with our readers.


tantalizingly tangy meatloaf & roasted new potatoes


Tantalizingly Tangy Meatloaf
1 lb. ground beef (optional - 1/2 lb. pork, 1/2 lb. beef)
1/2 cup dry bread crumbs
1 egg
garlic powder to taste
1 dash worcestershire sauce
1/3 cup ketchup
1/4 cup packed brown sugar
1/4 cup peach &/or pineapple preserves (I use peach because I can never find pineapple)

***Preheat oven to 350*.  In a large bowl, combine the beef, bread crumbs, egg, garlic powder, & worcestershire sauce.  Mix well & place in a loaf pan.  Bake for 30-50 minutes.

***Meanwhile, in a medium bowl, stir together the ketchup, brown sugar, & preserves.  Pour over meatloaf about 20 minutes before removing from oven.

So, go try this recipe and let me know what you think!  
Satisfaction guaranteed!

I'll be sharing this recipe at these parties!  

Happy Tuesday!

Read more...

Monday, March 14, 2011

Shut Up and Sew: Dream Crib Sheet

When I found out last month that I was having a little girl, I called several friends immediately to let them know the news.

Me: "It's a girl! I'm so excited!"

Them: "Yay!...Were you hoping for a girl?"

Me: "No, I didn't care either way. It's just that my favorite fabrics are all for girls!"

Jayce 3

It's true folks, there are some sweet patterns out there for our little ladies.

There are adorable things for boys too, of course, but never having the need to browse the "girls section" of the fabric aisles before, it is a newfound pleasure and I have been loving it. Particularly since we had crazy inclement weather hit immediately after we found out the gender, which prevented me from heading to the store to browse sweet little lady dresses and bloomers, so instead I browsed Etsy for sweet little patterns. And I found them.

Jayce 4

I fell head over heels in love with these adorable elephants. They are Ele-Fete Shell from Cloud Nine fabrics, and I got them from the incredible shop, Cedar House Fabrics. Lela, the owner of the shop, is super helpful, replied to my convos right away, and put them in the mail that day! How wonderful is that?! I can't say enough about a shop with great customer service and FAST shipping!!

There was all sorts of love when these fabrics arrived at my house. I squealed when I opened the package. (I may have even snuggled the fabric a little bit.)

I don't necessarily have a thing for elephants, but I love the simple features of these little elephants, and come on, they are holding strands of bunting!! Really, does it get any cuter?!

Jayce 5

When I saw this fabric I knew that it had to make it's way into the baby bedding. Those sweet elephants just killed me, and the fabric is 100% organic cotton so it is super soft. I received several bits of fabric in the mail in the past few weeks for various projects, and this is by far the softest. It's exactly what you'd want up against that sweet newborn skin. PERFECT for the crib sheet.

I washed it, ironed it, and was ready to go.

Febw4 3

I followed a great tutorial for a crib/toddler bed sheet found here, by Dana from Made. Dana is a sewing genius, and I knew that whenever I finally decided to give sewing a shot, that I'd have to try out a few of her tutorials. It turns out that some projects actually are as easy as they seem. But this was my first time sewing something that required a substantial amount of fabric, and something that required elastic, but I was ready. And the result was just perfect.

Sheets 4

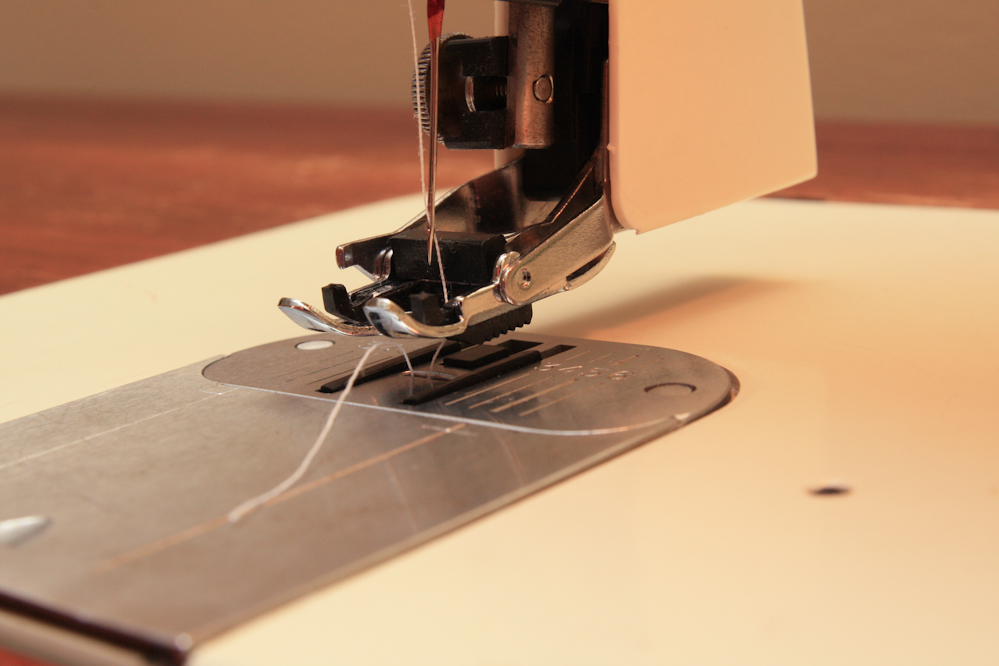
I did enlist the help of this fancy walking foot for this project and was so happy that I did. I hope you can see in this picture, but the walking foot (or even feed foot) has these black teeth on the bottom of it that help grip the fabric and move it through the sewing machine with the feed dogs that are located on the bottom of your machine. (Several of you mentioned that this would help me to keep my fabric lined up better as I was sewing-thanks for the GREAT tip!!)
Feb4 2

Since this tutorial requires making a casing to hold the elastic, the walking foot kept my fabric lined up on the right seam allowance, which I thought would be more difficult since I was working with such a large piece of fabric and basically sewing it into a big circle. (Okay, sewing it into a big rectangle with rounded edges. ) I was able to keep better control of the fabric, even when I was sewing at a fast speed!!

Feb4 1

One thing I would remind you of when tackling this tutorial, is don't forget to check the thread on your bobbin before you get started!! There is not tons of sewing involved, but there is one very long line of stitching in this project, and it would be such a bummer to make it a little ways around and need to refill your thread. Since I have only taken on smaller projects up to this point, I was really aware of possibly running out. If you do, it's no big deal, but just a good thing to check before you get started.

Sheets 6

This crib sheet was such an easy project! So easy, that baby is getting another custom sheet as well. I think the blue elephant set will do perfectly. But Cedar House Fabrics is completely stocked with 100% organic cotton material, so any of the choices will be just as soft and hopefully as sweet!

I love that I was able to get exactly what I was looking for in the bedding, not just my favorite that the store had to offer. Buying your own fabric and spending a little time at the sewing machine is a great way to make sure that your nursery is stocked with your dream crib sheet!!

Sheets 2

I'll be linking to these parties this week, so come see what everyone else has been up to!

Happy Monday!!


E1025F317CFB5B8E9E5C526E5CC0F475 copy

Read more...

Saturday, March 12, 2011

Free 8x10 Canvas Offer, IT'S BACK!

Some of you may remember back to last November when Canvas People had a great promotion going on for a FREE canvas print? Well, guess what? IT'S BACK! You can get an 8x10 photo-wrapped canvas free!

I took advantage of the offer last time around and was pretty pleased. One morning back in the fall my sweet daughter and husband were reading snuggling on the couch reading the morning newspaper. It was such a sweet memory so I snapped a couple of pictures. I definitely wanted to capture the moment! When this offer came around, I decided I wanted to use one of these photos of my daughter for the canvas. I took the 'well-worth it' option of upgrading to an 11x14 (for only $9.99!!) and this was the result:


Definitely a memory captured I am so excited to display! Now to just find the perfect place...

Now it's your turn! Any holidays coming up that you would enjoy giving this gift for? I know as a mother I think this would make a sweet gift for Mother's Day or Father's Day, right? If not, just do what I did and pick your favorite picture and give yourself a little treat instead!

To order, just click over here to the Canvas People and follow a few easy steps to process your order. This promotion saves you a great amount of money and won't last long! Take advantage by clicking here if you are interested!!


Read more...

Friday, March 11, 2011

Stenciled Table Runner

I fell in love with this polka dot fabric I found at a thrift store and to my surprise how perfect could it be for just my little bitty dining room table!

But you know me; I can't leave well enough alone. And rightfully so..take a look!!


Voila! With the Cutting Edge's Large Paisley Wall Art Stencil I was able to bring out a unique and inviting style to my now "not so shabby" little nook! {which I simply can't take my eyes off of!!]


The first thing I did was make sure my fabric was ironed and exactly the size I wanted.
Next, I secured my Cutting Edge Stencil to the top of the fabric using duct/electrical tape. It's always a great idea to place some cardboard underneath your project to prevent any paint that might seep through as well.


Lastly, the most simplest part: I simply rolled over my stencil with some Navy fabric paint and that was that! An elegant, "store bought" looking table runner!! I just love how the polka dots show through the navy!

I'm sure by now with all of the exclamation points you can tell I am overly joyed with the way this turned out!

Some other fun projects I've been wanting to try are on magnetic boards, windows and on ceramics like this...


Yep..wouldn't that be a great conversation piece?

Thanks for stopping by and check back next Wednesday for a Cutting Edge Stencil Giveaway!

I'll be linking up to these inspiring parties!

Read more...

Thursday, March 10, 2011

A Silhouette Project: Frame Tray Refresh

You may not believe it, but I can think of at least one thing that has stuck around in my living room decor for the past year: The Frame Tray. I love it. It anchors my over-sized coffee table and serves as a somewhat stylish catch-all for remotes, drinks, etc. Though it has stuck around in grand fashion for a long while, I knew that in order to continue this record it would need a little re-fresh.

So, I put my fabulous Silhouette machine to work and made this:

I decided to order navy blue vinyl for two reasons; one, I was dying to try the vinyl, and two, I thought navy blue would be different. I have since decided that I need to stick with what I know for this project and maybe replace the navy with white, but it made the vinyl no less WONDERFUL to work with. It was pretty much a breeze, which is saying a lot since I had no clue what I was doing, and didn't slow down enough to read very many directions!
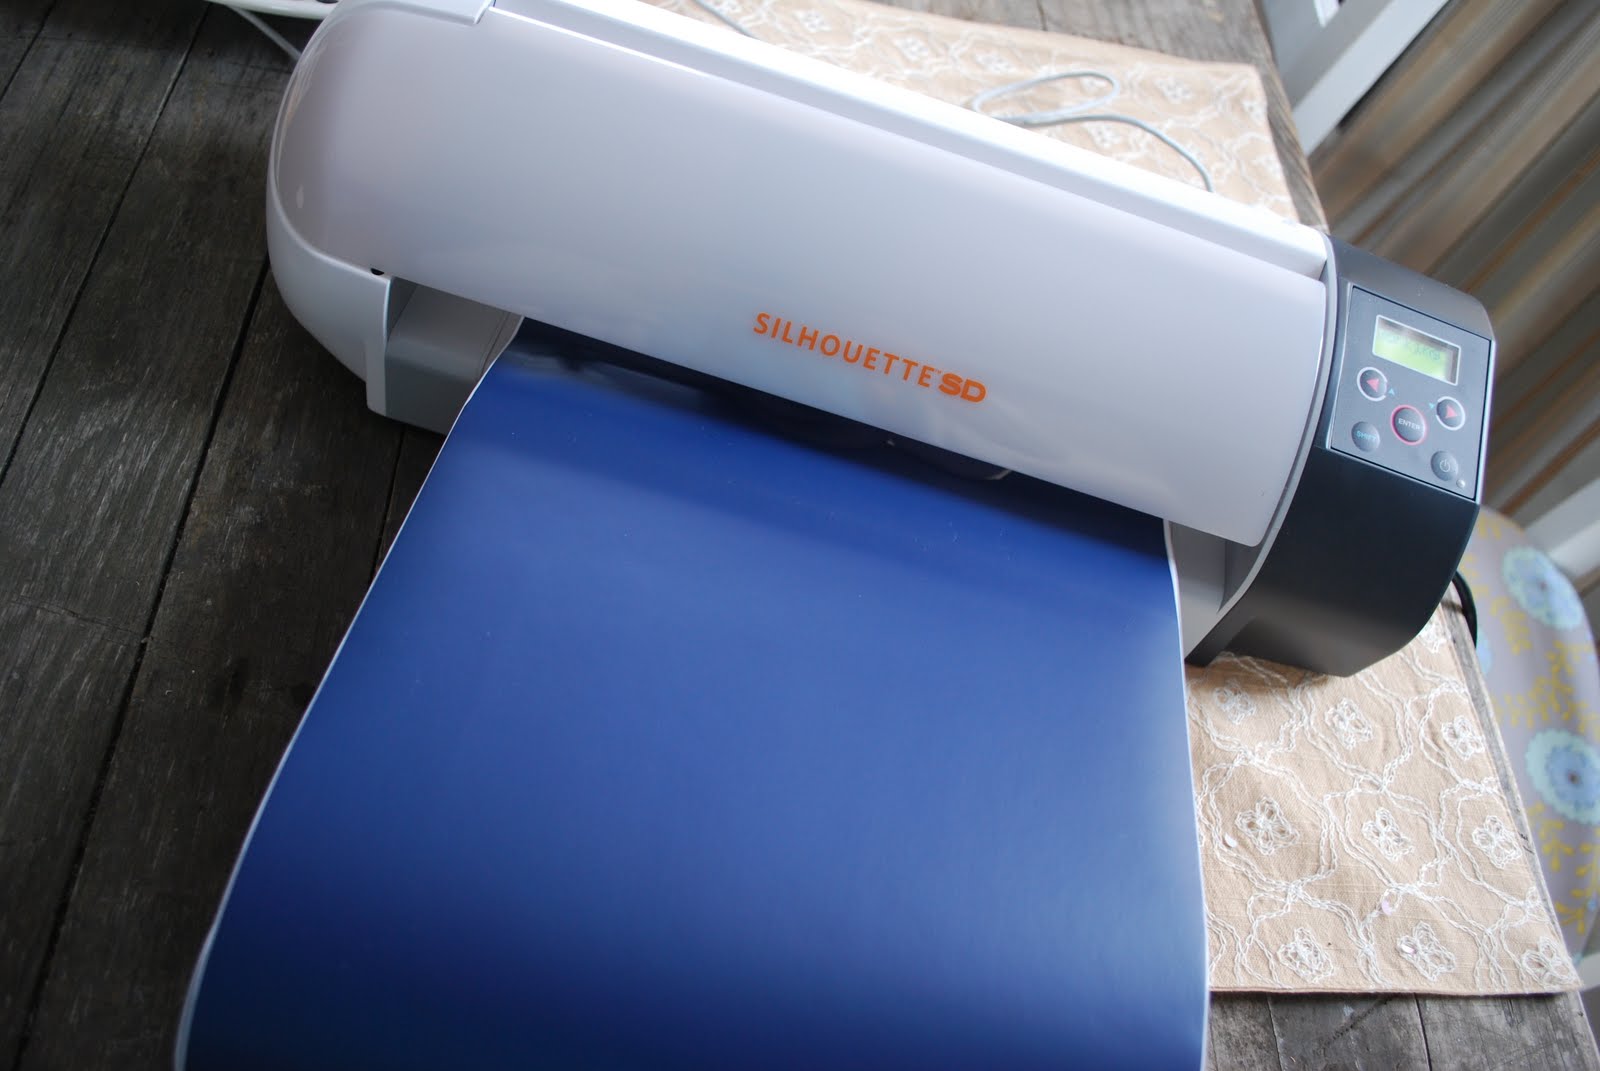
First, I used a font I liked and the Silhouette Studio Software on my Mac to design a quick monogram. (You will notice as we go that I am missing some step by step pictures. I got a little too excited and a little carried away, forgetting to take pictures along the way!) Then I just loaded my vinyl in and pressed cut:

And wouldn't you know it, I forgot to read some key instructions that reminded me to change the blade I was cutting with: oops! Lucky for me, I wasted just a couple of inches and the vinyl rolls seem to be never ending!

I also apparently overlooked the need for transfer paper which would have made this project much quicker! Apparently you can just rub that stuff right on after your cut out your shape? Then, it keeps the design in line to allow for a perfectly even transfer.

Luckily for me, I figured out how to proceed without, mostly due to the fact that the vinyl was incredibly easy to work with and would be peeled, stuck, unpeeled and re-stuck without harming the design in the least.

(For full directions on how to apply the vinyl, look here, or look on the insert that comes with your adhesive vinyl from Silhouette. They make it so easy!)

I first placed the design in the middle.

I knew that since I always have a vase of flowers on the tray, I would hate not seeing the monogram, so I quickly peeled and re-stuck it in the corner. The vinyl was beyond easy to use! (Now I am thinking I might change it back...thoughts? Does that really surprise anyone?)

I'll be linking to these parties this week. Hope to see you there!!

Happy Thursday,

Read more...
Related Posts with Thumbnails